• Skip to primary navigation
  • Skip to main content
  • Skip to primary sidebar

At Home With MrsC

Raising a family, making a home.

  • Home
  • About Me
  • Contact
  • Guest Post

Recipe

Recipe: Chicken Adobo by MrsC

December 3, 2013 by MrsC | Patricia Cuyugan 3 Comments

One of the things that MrC and I did in preparation for his family’s arrival from the US last October was stock the refrigerator in their condo unit with healthy, home cooked meals. I love to cook, and so I had a great time preparing some of our favorites for them. I was extra excited about being able to feed my dad-in-law with food from my kitchen because he was the one who took the time to teach me how to cook, back when they were still living in Manila.

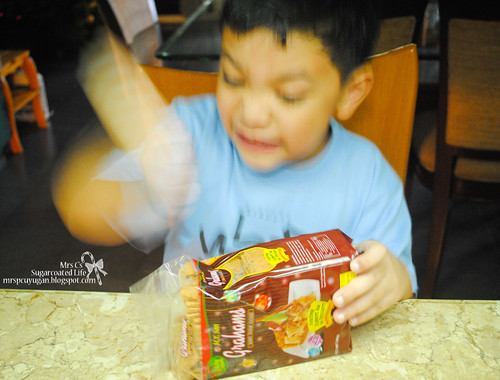
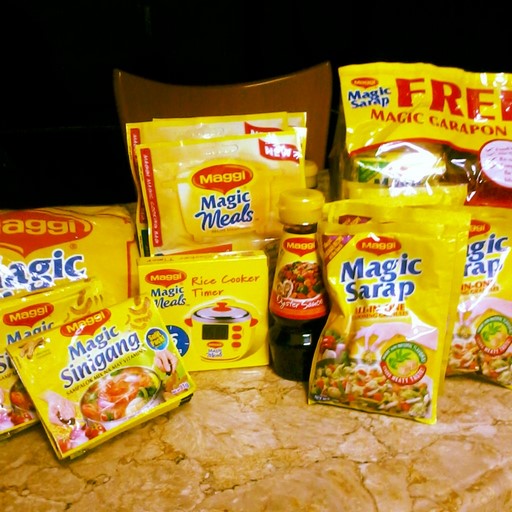
My whole kitchen experience became even more fun when this bag of goodies from Maggi arrived at my doorstep, literally days before I was to start preparing my cook and freeze meals. Maggi is actually one of those brands that I remember from TV time in my childhood, along with Wok With Yan and Cooking With The Daza’s. Yup, I have loved watching cooking shows for as long as I remember. The noodle soup commercial with Tita Maggi is one of the ads that I remember seeing a lot during those days. Coincidentally, Tita Maggi became Tita Menchu to me, when her daughter became a friend in high school, but that’s another story altogether.

Instagrammed!
Instagrammed!

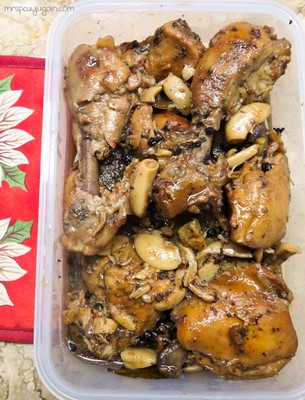
Back to my story. One of the dishes I prepared for the family was a skinless chicken adobo. Now, I will be honest, I love pork adobo more than chicken adobo because I’ve always found it to be tastier. But, now, I think I’ve found a chicken adobo recipe that I really, really like, which is actually a tweaked version of an Adobong Puti recipe from the Maggi website (you can see the orignal recipe here) plus this Kris Aquino recipe and my mom’s good old ever-reliable adobo.

Chicken Adobo by MrsC

Chicken Adobo
2014-06-12 16:28:18
Serves 6
Write a review
Save Recipe
Print
Ingredients
  1. 1/2 kg chicken leg quarters, separate the thighs from the drumstick and remove all of the skin
  2. 1/2 kg chicken breast, cut into 4pcs each and remove all of the skin
  3. 2 heads garlic, peeled and smashed
  4. 1 medium onion, sliced
  5. 1 cup sukang sasa
  6. 1/2 cup soy sauce
  7. 1/2 cup water
  8. A handful of whole peppercorns
  9. 3 bay leaves
  10. 1 tbsp brown sugar
  11. Half of the contents of one 50g pack of Maggi Magic Sarap
  12. 2 tbsp vegetable oil for frying
Instructions
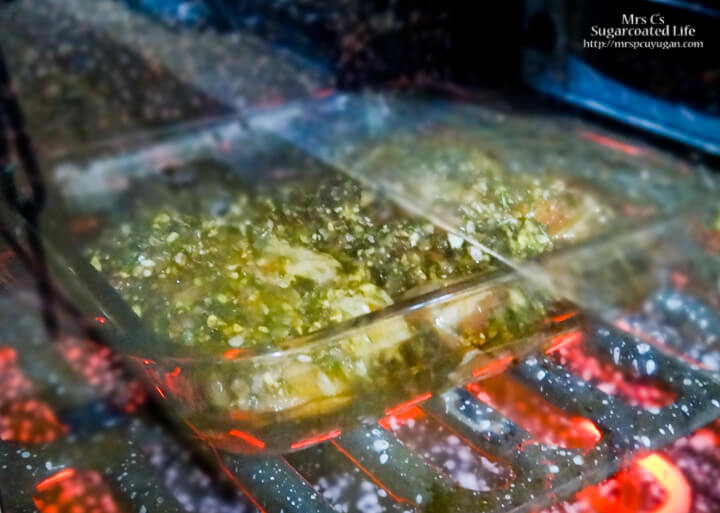
  1. Place all of the ingredients, EXCEPT the oil, in a pot and bring to a boil. Simmer covered for about an hour, or until chicken is tender. Remove the chicken pieces from the sauce once done.
  2. Continue to boil the sauce until it is reduced by half.
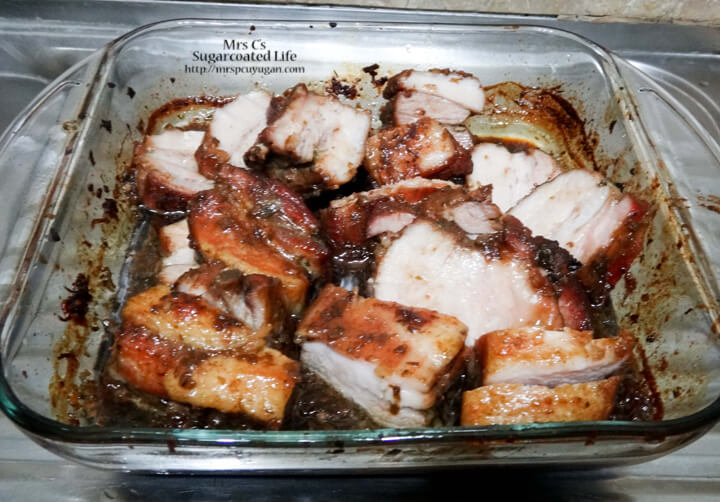
  3. Fry the chicken pieces in a little bit of oil until golden brown.
  4. Return the fried chicken pieces into the reduced sauce and bring to a boil.
Notes
  1. This dish is best served with steamed white rice and a ripe banana or a slice of ripe mango.
  2. I keep the peppercorn and the garlic whole because I love biting into them after they've stewed in the adobo sauce. Super, super yummy!
  3. You can also opt to fry the garlic after the initial boiling period so that it becomes nice and crispy. You should probably chop it up, though, if you plan to do this.
By MrsC
At Home With MrsC https://blissbysam.com/
For more delicious recipes, visit the Maggi Facebook Page and website!

How do you prepare your adobo? ๐Ÿ™‚


Filed Under: Recipes Tagged With: Chicken Adobo, Filipino Food, Maggi, Recipe

Halloween, A Homecoming, and A Recipe for Sinigang

November 26, 2013 by MrsC | Patricia Cuyugan 5 Comments

Two weeks ago, I excitedly announced my return to my online world with a post about Blogapalooza. Guess what? I ended up missing that event, and going another couple of weeks without being able to post anything here. Yep, I’ve been a very busy bee. The good news is that since I’ve been busy living my life, I now have a whole collection of stories to write!

October ended on a super high note for me with two fab workshops, quality time with family, and a much-awaited homecoming. One of the highlights was a Tunisian Crochet for Beginners session that I attended. I love when I get to be a workshop participant instead of an organizer, for a change. The week after, our Manila Workshops team pulled off a successful, first-ever WAHMderful Weekend, which, for me, was the day that I became a certified WAHM.

The last day of the month was extra special for our family. During the day, the boys and I did our usual rounds of the village for Halloween. Here’s a photo of our little Ben10 going around for candy, plus a few other interesting costumes we saw that afternoon.

Halloween (1 of 3)
Ben10!

[Read more…] about Halloween, A Homecoming, and A Recipe for Sinigang

Filed Under: Recipes Tagged With: Costume, Family, Halloween, Maggi, Recipe, Shrimp, Sinigang, Trick or Treat

My Favorite Crispy Corned Beef Recipe, As Told On Instagram

June 25, 2013 by MrsC | Patricia Cuyugan 8 Comments

There are perks to following me on Instagram, like those mornings when I decide to share step-by-step instructions for preparing my favorite meals as I cook. I actually did that for the first time a few weeks ago, and I had a lot of fun with it. I prepared crispy corned beef for brunch that day, and I thought I’d share the recipe here too, in case you and I aren’t friends on Instagram yet. But yeah, we should be friends!

IMG_20130525_095408
Step1: Straight from the can, no oil, simmer over low heat until all the liquid evaporates.
IMG_20130525_100328
Step2: stir-fry until super dry and flakey. Move the corned beef around a lot or else it will burn. Remember, low heat.
IMG_20130525_102131
You know you’re almost done when it starts to get stringy and flakey. It starts to smell toasty too.
IMG_20130525_103208
Be careful towards the end coz there is but a fine line between toasted and burnt. Aaaand the crispy corned beef is done!
IMG_20130525_101226
Crispy corned beef is best paired with garlic rice and pork and beans!

Yes, I know, this looks really unhealthy. And it is. But hey, it’s really great comfort food. Try it, and I swear you’ll understand what I’m talking about!

SignatureNew

Filed Under: Recipes Tagged With: Breakfast, Brunch, Crispy Corned Beef, Recipe

Thai Night: Shrimp Pad Thai Recipe

February 15, 2013 by MrsC | Patricia Cuyugan Leave a Comment

A few weeks ago, my mom and I collaborated on a fabulous Thai dinner at home. She bought a pack of rice noodles during one grocery trip and decided that I would make Pad Thai. Since she chose the dish that I was going to prepare, I picked a recipe for her too. Her dish was Marinated Thai-Style Pork Spareribs, a yummy recipe I found on Epicurious.com.

Baking the spareribs.
Cut up, and ready to eat! Yum!

I was originally planning to follow the Pad Thai recipe that was printed on the bag of noodles, but at the last minute I decided to search for a recipe online instead. I ended up on Cherry On My Sundae, and decided to go for her version of Pad Thai because it looked so good in the photos. It also didn’t contain any chicken, which is perfect since I quit eating chicken due to my eczema. It does, however, have egg in it, and that sort of defeats the purpose of being chicken-free. Oh well.

Click to see a rundown of all the yummy stuff I cooked in January.

[Read more…] about Thai Night: Shrimp Pad Thai Recipe

Filed Under: Recipes Tagged With: Noodles, Pad Thai, Recipe, Thai

Recipe: No-Bake Graham Cracker Crust

December 8, 2012 by MrsC | Patricia Cuyugan 1 Comment

We’re having a get-together at home tomorrow, and my mom asked me to make something for dessert. We have this big container of frozen mangoes that she really wants to use already, so we decided on a mango mousse with graham cracker crust.

I’ve never made this before so I went to my favorite website, marthastewart.com to look for a recipe. I found a recipe for a frozen mango cream cake recipe with macadamia crust that looks really good. Since we already bought bags of graham crackers, I decided to use a different recipe for the crust.

I’m feeling lazy today since it’s a Saturday, so I wanted a no-bake recipe. I ended up using this one from All Recipes.

No-Bake Graham Cracker Crust

  • 1 1/2 Cups Graham Cracker Crumbs
  • 6 Tbsp Butter, Softened
  • 1/3 Cup Granulated Sugar
You’ll also need a 9″ Pie Plate, a Mixing Bowl, a Fork/Spoon and Measuring Cups


NOTE: Don’t forget to crush the graham crackers if you didn’t buy them already crushed, and soften the butter beforehand. It helps to cube the bar of butter so it softens quickly, although to tell you the truth, getting butter all soft and gooey has never been a problem in this hot country.

Here’s my assistant crushing the graham crackers


Getting the butter nice and soft


Combine all the ingredients in a bowl. Or, if you are lazy like me, bring out your handy dandy food processor and pulse away!

The easy way!


You’ll know it’s ready when it looks like this. Can you guess what Tristan said it looks like? Haha!


Press the crust firmly into the bottom and sides of a 9″ pie plate. You can use a spoon, a fork or your hands. I use a fork and spoon combo – the fork to distribute everything evenly, and the spoon to smooth out the surface. I don’t really like to get my hands dirty, and I find it’s more hygienic. Yes, there’s a little bit of OC in me.

Finished crust, ready for the fridge


Once it’s all nice and pretty, cover with plastic wrap and refrigerate for an hour or until set. Make sure the plastic wrap doesn’t touch the crust ok? Otherwise parts of it may stick to the plastic once you remove it.

And that’s it, nice and easy! You can fill this baby up with a whole lot of different things. My favorite is still Blueberry Cheesecake, but I really hope this Mango Mousse will come in a close second. Keeping my fingers crossed!


What other fillings would you recommend?

Filed Under: Recipes Tagged With: Dessert, Recipe

Recipe: Cheesy and Milky French Toast

July 18, 2012 by MrsC | Patricia Cuyugan 4 Comments

Good morning!

One of the great things that’s come out of my leaving the workforce to focus more on being a mom is my learning to become a morning person. Waking up before 8AM has always been a challenge for me.

You would think that I’d be up and about by 7AM at the latest considering my 9AM clock in time at the office. But in truth, I’d be lucky to be out of bed and functional before 8:30. That explains why I was always late for work.

It wasn’t as bad when I started working close to home as it was when I would report to a Makati office. But anyway, enough about my delinquent past, after all I think I’ve been making up for it in recent weeks.

I now typically get up – as in functioning and moving about, not just awake – between 5:30 and 6AM! Can you imagine that? Yeah, never thought I’d be able to do that either. But my weekdays have been starting out that early for the last two months, with, of course, the occasional lazy morning exception.

Since I’ve been up so early, I’ve actually learned to start my day by eating breakfast. Yay! I think this is a tremendous breakthrough from having started my mornings with a hurried cup of coffee for the last five or so years. I’ve never been a morning person, so this is a definite first for me.

The only downside is I find myself tired and sleepy by 6PM, but amazingly I manage to pull through until after the little guy is fast asleep. Next up on my agenda is finding out how to have more energy throughout the day, and I already know that the answer is exercise. Lol.

So anyway, the point of this post is that I prepared a really great breakfast for my kiddo today. We both love French Toast, and I thought I’d make ours a little more exciting in the form of (his) Cheesy and (my) Milky French Toasts.

Of course, this is nothing more than cheese spread or condensed milk sandwiched in between two slices of bread, dipped in egg and milk and cooked with a little margarine (I use margarine because I don’t like the taste of butter *gasp!*).

I tried the cheesy version once with sliced cheese and found that it was tough keeping the bread slices together when dipping and flipping, so I shifted to cheese spread. The milky version is inspired by my oh so favorite Milk Toast from Kopi Roti but with the condensed milk sandwiched instead of on top of the bread. I love condensed milk. Uh-huh, this is why I’m fat.

I also prefer to use frozen old bread for French Toast, since it doesn’t go all soggy on me. I usually place old bread in the freezer straight away for mornings like this one. 

Cheesy and Milky French Toast

You will need:

  • Frozen Sliced Bread – I used both wheat and white bread, mostly ends!
  • Cheese Spread – I used Cheez Whiz
  • Condensed Milk – I used Carnation Condensada

  • Two Eggs
  • About 1/3 Cup of Milk – I used Magnolia low fat milk
  • Plus: Margarine and Pancake Syrup!

Step-By-Step:

  1. Whisk the milk and eggs together in a bowl until it becomes pale yellow and frothy.
  2. Spread condensed milk or cheese spread between two slices of bread. Don’t put too much or it will run over the sides of the bread and make a mess in your pan.
  3. Dunk the sandwiches into the egg and milk mixture. You will need to soak these a little longer than usual because there are two slices of bread that you need to moisten, plus the bread slices are frozen.
  4. Heat a frying pan, spread some margarine (or butter, if that’s what you prefer), wait for it to sizzle then place the bread on top. I like to put a little bit more margarine on the slice that’s facing up so that it browns nicely when I flip it.
  5. Brown to your liking, and you’re done!
Ready to flip!

I like my French Toast extra toasted, so it may look overdone to you, but it’s just right for me. So sorry for the out-of-focus photos. The Blackberry camera sucks bigtime.

Milky French Toast made with whole wheat bread
Cheesy french toast made with white bread

Serve hot with more butter or margarine (if you wish, but I don’t add any more) and topped with pancake syrup!

Enjoy!

Filed Under: Recipes Tagged With: Breakfast, French Toast, Recipe

  • « Go to Previous Page
  • Go to page 1
  • Go to page 2
  • Go to page 3
  • Go to page 4
  • Go to page 5
  • Go to Next Page »

Welcome to my online home

Hi, I'm MrsC, a happy wife and mom, a help-less but not helpless homemaker, who is learning to live simply in this complicated world.

Copyright © 2025 ยท Twenty Seven Pro on Genesis Framework ยท WordPress