• Skip to primary navigation
  • Skip to main content
  • Skip to primary sidebar

At Home With MrsC

Raising a family, making a home.

  • Home
  • About Me
  • Contact
  • Guest Post

Recipe

Recipe: Bangus Ala Pobre

September 26, 2014 by MrsC | Patricia Cuyugan 13 Comments

It’s been a while since I have gone food shopping, simply because I’ve decided to use up whatever’s in the fridge and freezer before I buy anything else. Thing is, my mom keeps buying stuff in small batches (thanks, Ma!) so we never run out of food. Now, because I’m making do with what’s on hand, I’m forced to be creative with what I cook. Luckily, with the addition of a brand-spanking new bottle of Lea and Perrins Worcestershire sauce to our pantry, I had all I needed to make one of our family faves, Bangus Ala Pobre.

Lea and Perrins1
This dish wouldn’t be complete without you, Lea & Perrins!


This is a perfect early morning quick baon recipe because you don’t need to marinate it for very long, and it cooks real quick too. Everything can be prepared the night before and placed in the refrigerator so that you aren’t scrambling for ingredients before dawn. If your fish is frozen, make sure you move it from the freezer to the fridge before you sleep so that it’s thawed enough when you wake up.

Soaking up all of the flavor


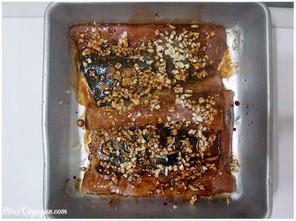
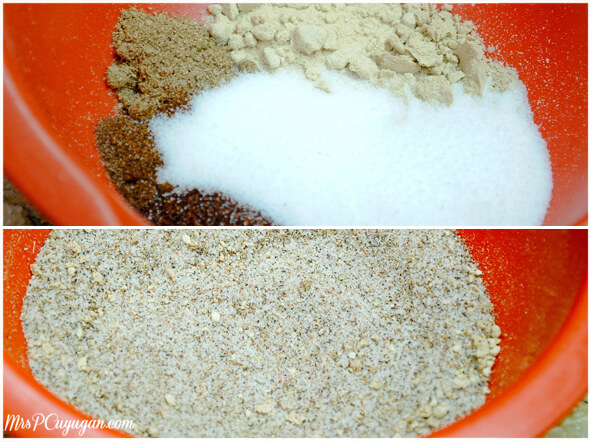
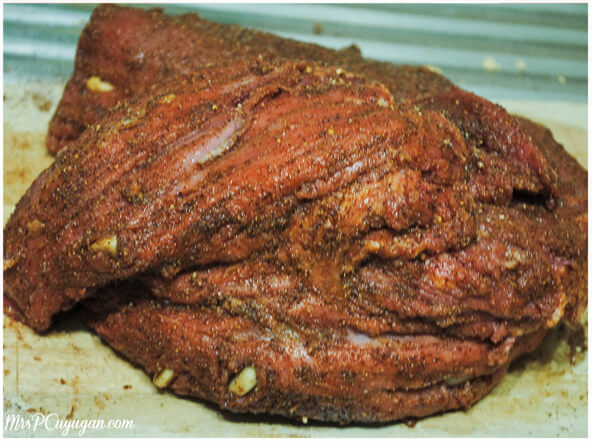
All you need to do is mix 10 cloves of minced garlic, a tiny bit of calamansi or lemon juice, salt and pepper, and 1 tablespoon of Worcestershire sauce in a bowl. Pour the marinade over 2 boneless bangus bellies and let it soak for 15 minutes or so. During this time, I wash and prepare my rice then turn on the rice cooker.

Yay for freezer meals!


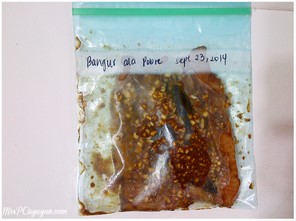
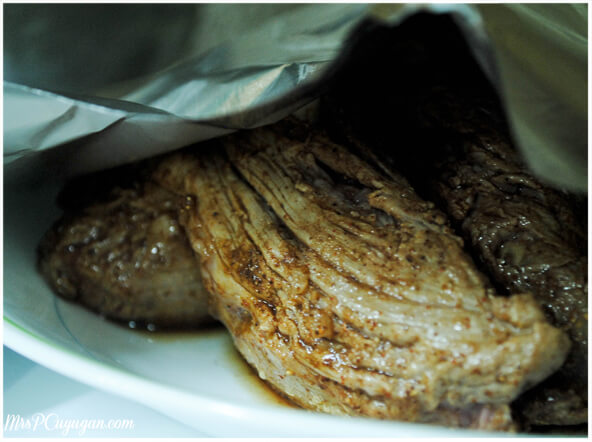
One belly is enough for the boys and I (for now), so I put the second one in a handy dandy GLAD Freezer bag and pop it in the freezer for another day. Don’t forget to label your food keepers or zipper bags so you know what you have on hand, and when it went into the freezer. Once you’re ready to cook, simply heat up some olive oil in a pan and fry the fish. Be careful coz this pops! 

Lea and Perrins4
Ta-done!

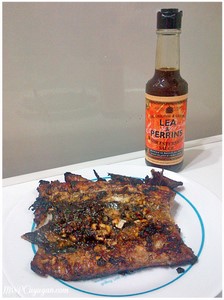
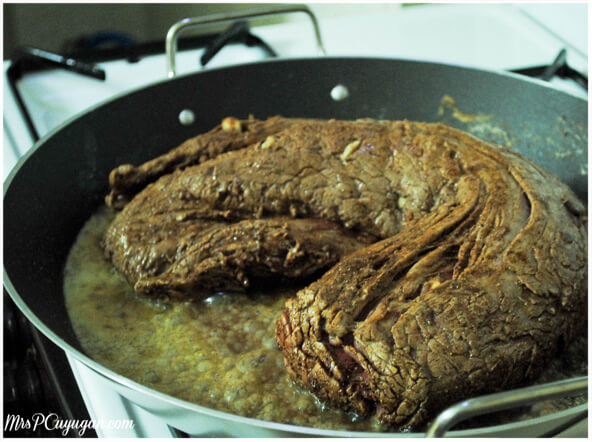
I like to fry this skin side down first, then flip it to get the belly and the garlic bits all nice and toasty. Serve immediately with hot rice, and vegetables or scrambled eggs on the side. 

Bangus Ala Pobre
2014-09-26 06:40:51
Serves 4
Made with Lea & Perrins Worcestershire Sauce
Write a review
Save Recipe
Print
Ingredients
  1. 2 pcs Boneless bangus belly, unseasoned
  2. 1 Tbsp Lea & Perrins Worcestershire Sauce
  3. 10 Cloves of garlic, minced
  4. The juice of 1 calamansi
  5. Salt and Pepper to taste
  6. 1 Tbsp Olive oil for frying
Instructions
  1. Make the marinade by combining the Worcestershire sauce, garlic, calamansi juice, salt and pepper.
  2. Pour the mixture over the bangus bellies. Marinate for at least 15 minutes.
  3. Heat oil in a frying pan. Fry bangus skin side down until the edges are golden brown. Flip the fish and continue to fry until the garlic bits and fatty portion are toasted.
  4. Serve immediately.
By MrsC
At Home With MrsC https://blissbysam.com/

Filed Under: Food & Recipes, Recipes Tagged With: Bangus Ala Pobre, Freezer Meals, Isang Kutsara Challenge, Lea and Perrins Worcestershire Sauce, Recipe

Recipe: Banana Swiss Miss Muffins

August 19, 2014 by MrsC | Patricia Cuyugan 21 Comments

Have you ever tried baking with Swiss Miss? As in the hot chocolate mix? Me neither, until yesterday.

Banana Swiss Miss Muffins


I decided to make peace with our 20+ year old oven by attempting to bake a nice snack treat for Little MrC. Since it’s exam week, he’s home way before lunch time, so this week is filled with more mommy time than WAHM time. I could see he was getting bored with his usual afternoon cartoons. Blame it on him being stuck at home with a fever over the last 5 days. Because Cartoon Network and Toonami weren’t doing their usual magic, I had to think of a quick activity that we could do. And so, I went ahead and cranked up the heat on our old-timer oven. Bahala na if the temperature on the right is hotter than the temperature on the left. Lol.

Making this kid work for his food!


I got the little boy all excited about mashing bananas, put an apron on him and set him to work. I realized too late that I should have checked that I had everything we needed in the pantry before I involved the little boy. The original plan was to make choco banana muffins like these ones by Nigella, but using tablea instead of cocoa powder. Toinks, my stash of tablea apparently went bad in the freezer during that Glenda storm, and my mom had gotten rid of them already. We also didn’t have any cocoa powder. I could have just gone with plain banana muffins, but I already said chocolate (the magic word) to the little boy. I had to think fast. I decided to use Swiss Miss. The dark kind.

“Mom, are they done yet?”


They came out yummy. There’s not a lot of sugar in the recipe, so the sweetness comes mostly from the bananas. The riper the better. I like to use the nearly rotten ones for baking. Those are the best. The end result was not as chocolatey as it would have been if I used proper cocoa, but for a quick meryenda fix, a fun bonding afternoon with my kid and quick snack box fillers for today, these are more than good enough.

“Time to get a plate?”


Banana Swiss Miss Muffins
2014-08-18 18:37:40
Write a review
Save Recipe
Print
Ingredients
  1. 3 overripe (as in borderline bulok) bananas
  2. ½ cup vegetable oil
  3. 2 large eggs
  4. ½ cup brown sugar
  5. 1 ½ cups all-purpose flour
  6. 1 packet Swiss Miss Dark Chocolate Sensation
  7. 1 tsp baking soda
Instructions
  1. Preheat your oven to 400°F. Line a 12-cup muffin pan with paper liners. The cuter the better!
  2. Mash the bananas to baby food consistency.
  3. With an electric mixer on low (or by hand), combine the mashed bananas and vegetable oil. Add in the egg and sugar.
  4. In a separate bowl, sift together the flour, Swiss Miss and baking soda.
  5. Gently add the dry mixture to the banana mixture. Do not overmix! It's totally fine if your batter is lumpy.
  6. Spoon batter into the prepared muffin cups. I use an ice cream scoop for this so that I get relatively uniformed muffin sizes.
  7. Bake in the preheated over for 15-20 minutes. These should rise significantly and become a nice shade of cocoa brown when done. Cool the muffins slightly in the pan before removing to a wire rack to cool completely.
Notes
  1. This tastes super awesome topped with fruit preserves or with cream cheese frosting.
By MrsC
Adapted from KITCHEN Recipes from the Heart of the Home
At Home With MrsC https://blissbysam.com/

Filed Under: Recipes Tagged With: Baking, Banana Swiss Miss Muffins, Muffin, Recipe

Recipe: Perfect Pork Steak

August 6, 2014 by MrsC | Patricia Cuyugan 16 Comments

As you know, I am one of those home cooks who likes to make meals ahead and freeze them. Whether it’s a marinate and freeze dish or an extra container of soup or stew, you are sure to find quick to cook or easy to reheat meals packed away in my freezer. Yes, takot ako magutom, and this is proof!

I love marinating meat ahead and then freezing it in portions that are just enough for our family. I find that dishes really do end up tastier this way, and for me, tastier is definitely better. I also prefer to put things away in exact serving portions already to minimize leftovers. I get to maximize our refrigerator space that way.Since we share fridge space with a whole lot of people, it’s best to keep things at a minimum.

This week, I decided to make a batch of Pork Steak for the boys. We’re a small family, so 1/4 kilo of pork loin is actually good enough for 2 meals for us already. Tipid! I have a feeling that this won’t last long, though because Little MrC is slowly but surely starting to eat like a big boy. 

Pork steak was something that I got to eat at MrC’s family’s house more often than my own house. I know for a fact that he misses his family’s homecooking, and so I thought that I’d try to make more of the food that I’d eaten there before. So we started this week off with a yummy, soft pork steak that I am actually pretty proud of. 

Pork Steak by MrsC
Pork Steak by MrsC


Pork Steak
2014-08-05 21:39:21
Serves 4
A quick and easy pork recipe. Perfect as a marinade and freeze meal.
Write a review
Save Recipe
Print
Ingredients
  1. 1/4 kilo pork tenderloin aka lomo
  2. 1 tbsp calamansi juice
  3. 3 tbsp soy sauce
  4. 2 tbsp water
  5. 1/2 tbsp sugar
  6. A few dashes of cracked black pepper
  7. 1 small white onion cut into rings
  8. Garlic powder
  9. Vegetable oil for frying
  10. A pat of butter
Instructions
  1. Wash and trim the pork loin. Cut into 1/2" thick medallions.
  2. Make the marinade by combining the calamansi juice, soy sauce, water, sugar and black pepper.
  3. Arrange pork loin in a food keeper and pour the marinade over it. Marinade in the refrigerator for at least 30 minutes. At this point, you can transfer your container to the freezer if you are making this ahead.
  4. When you are ready to cook, heat some oil in a skillet.
  5. Once the oil is hot, pour in the meat and the marinade and allow to simmer until brown.
  6. Add a dash or two of garlic powder for added flavor, and a pat of butter to add richness to the sauce.
  7. If you prefer your pork steak to be more saucy, add water a tablespoon at a time.
  8. Once the meat is done, add the onion rings. Allow to cook until the onions are a bit wilted but still crunchy.
  9. Remove from the heat and serve over steamed rice.
Notes
  1. If you are marinading and freezing this, remember to thaw the pork steak completely in the refrigerator before cooking.
By MrsC
At Home With MrsC https://blissbysam.com/

 Oh hey, if you try this recipe at home, please let me know how you liked it okay? 🙂

Filed Under: Food & Recipes, Recipes Tagged With: Cooking at home, Freezer Meals, Make ahead meals, Pork Steak, Recipe

Recipe: MrC’s Birthday Roast Beef

June 5, 2014 by MrsC | Patricia Cuyugan 14 Comments

First of all, I have to apologize to those of you who were waiting for this week’s baon plan. I just found out at school orientation this morning that classes will only run for half the day on the first week of school, so the little boy will actually be eating lunch at home. Toinks. So, since there won’t be any baon preps this coming week, I’ve decided to push back my lunchbox plan posting by a week. Thanks for understanding, you guys!

I will share a recipe today, though, one that I know some of you have been waiting for. I got super rave reviews from our family for the roast beef that I prepared for MrC’s birthday last May. It’s a really easy recipe, to tell you the truth. Still, it was the first time that I had ever made roast beef, and I was a little worried that I might kill the expensive piece of beef that we had purchased. Well, it turned out amazing. The photo below says it all.

Roast beef!
Roast beef!


It’s all in the ingredients!

If there’s one super crucial thing I have to stress about achieving roast beef success, it’s this – buy quality ingredients. This is one of those dishes that you will really want to splurge on, and it all begins with an excellent cut of beef. You don’t necessarily need to go imported and super expensive here, too. The piece of meat I used actually came from Tenderbites in Makati Supermarket. Try to get fresh and not frozen meat, and yes this will make a big difference in the tenderness and juiciness of the roast beef.

One more thing you need to remember to do is be generous with your seasoning. Remember that everything just sits on the utside of the meat, and that there is a chance that none of the flavor will really seep through all the way to the core. So, best to be certain that the surface of the meat is completely covered in the dry rub, and that you don’t scrimp on salt, pepper, garlic and butter. It may seem like a lot, but trust me, it’s just right.


Start by prepping the beef

Washed beef with slits for garlic slivers

 The first thing you need to do is wash your meat. You will want to get whatever slippy slimy stuff there is off of the surface. You will also want to trim off any excess fat and litid off as well. Don’t take all the fat off, though. That will help keep the roast beef tender. After washing, take a thin, super sharp knife and poke slits into the beef. This is where you will insert your garlic slivers. Make sure that the slits are deep enough – about an inch into the meat, and evenly spaced out. It’s totally up to you how much garlic you want to put, but in my opinion, more garlic = more fun.

More garlic, more fun

I actually let the meat sit in the fridge for about half an hour after I put the garlic in. I really don’t know if it made any difference in the taste, but I will do that again next time to check. While the meat is (literally) chilling, I mix up the rub. The inspiration for this rub came from this roast tenderloin recipe by The Pioneer Woman.

Here’s what’s in the rub

Again, this may look like a lot of salt, it really was just enough to season the nearly 2-kilo piece of tenderloin that I cooked. Next time I think I will measure out an extra batch of this, because I can totally use it as seasoned salt for things like pork chops and fried chicken. 

Measure and mix

With your hands, rub the seasoned salt into the meat. Don’t squeeze the beef so that none of the juices and garlic bits come out. Instead, just make as if you are giving your tenderloin a body scrub. Make sure you cover the entire surface of the meat.

After the salt rub

At this point, you will need to sear the beef. This gives it a nice brown color, and also helps to seal in the yummy juices. Honestly, I could have been smarter about how I did this step. See, the tenderloin we bought was pretty long. I could have opted to cut it into two or three smaller pieces to make it easier to manage. But no, I decided I would keep it whole, and would just adjust its position inside the pan to make sure that the meat is seared evenly. 

Seared in olive oil and butter

As you can see, that is a pretty big piece of meat. It didn’t fit into any of our pans and skillets, so I used a paella pan. This is seared in olive oil and butter, with the butter idea coming from Pioneer Woman as well. The butter gives the beef a golden brown color, and also adds a whole lot to the flavor of this roast.

Resting under a tinfoil tent

After searing, it’s time for the meat to rest. Put it on a plate and cover it loosely with a tinfoil tent. The resting allows the juices inside the beef to redistribute themselves evenly. I suggest that you take the opportunity to rest as well. 15 minutes is enough time for a quick shower, and I’m pretty sure you’ll be wanting one by now if you are cooking in the crazy Manila heat.


Time to Roast

Prepare to roast!

After resting for 215-20 minutes, the beef is ready for roasting. Preheat your oven to 475 degrees. Transfer the beef into an aluminum or glass baking pan. I use glass so that I can see what’s going on. Smash up some peppercorns and press the bits onto the beef. Then, top the meat with cubes of butter. I know, it doesn’t sound very good for you, but it is good.

Finally, stick a meat thermometer into the thickest part of the meat. This matters, because the internal temperature will determine the doneness of your roast. If you like yours on the more well done side, then you can totally skip this part and just time your cooking. But, if your aim is to have it perfectly pink inside, you need the thermometer. Fair enough?

Keep an eye on that thermometer

Take your meat out right before it hits 140 degrees. Do not slice this right away. Yes, you will need to let it rest again. If you slice now all of its juices are gonna end up on your cutting board and you will end up with dry, tough beef. Cover the meat with foil while it sits.

Fresh out of the oven

When you finally cut this up and put a piece in your mouth, it will totally be worth the wait. Remember to cut with a sharp knife. Nothing ruins a good roast better than a dull knife. I always turn to my brother for cutting and carving. Not only is he good at it, he loves doing it, too.

Perfection

I served this up with a spaghetti aglio olio. We also had warm french bread, which was perfect for mopping up the peppery butter and drippings that were lying at the bottom of the baking pan.

Sharing the recipe for this light and fresh pasta dish soon

We also prepared a platter of cold cuts and some of MrC’s favorite cheeses for everyone to munch on while we were cutting up the beef. Since it was a celebration, we also had a nice bottle of red wine. It was such a nice dinner, and I’m pretty sure I outdid the meal I prepared for MrC’s birthday last year.

Cold cuts, cheeses and french bread

I love that I get to prepare these labor of love meals for my husband’s birthday. He loves to eat, and he enjoys the food, so I’m all the more encouraged to come up with a yummy feast. Honestly, with the way this spread turned out, the pressure is so on for next year.

Of all things, what we forgot to get was a birthday candle!
MrC's Birthday Roast Beef
2014-06-05 06:56:19
Write a review
Save Recipe
Print
Ingredients
  1. 1.5-2kg Beef Tenderloin
  2. Half a head of garlic, peeled and cut into slivers
  3. 2 tsp Salt
  4. 1/2 tsp Onion Powder
  5. 1/2 tsp Garlic Powder
  6. 1/2 tsp Cumin
  7. 1/2 tsp Paprika
  8. 1/2 tsp Chili Powder
  9. Olive oil for frying
  10. 1/2 stick + 2 tbsp Salted Butter
  11. 1/4 cup Whole Peppercorn
Instructions
  1. Wash the meat and pat dry. Trim off any excess fat and muscle from the beef's surface.
  2. Slice 1" deep, evenly-spaced slits into the meat. Insert a garlic sliver into each slit. Let the meat sit in the refrigerator for half an hour.
  3. Prepare the dry rub my combining 2 tsp salt with the remaining spices in a bowl. Rub the mixture all over the surface of the beef, making sure that it is completely coated.
  4. Heat olive oil in a large skillet. Add 2 tbsp of butter into the oil. Sear the beef on all sides. This should take anywhere between 8-10 minutes, just until the meat is brown on the surface. Do not overcook.
  5. Transfer the beef to a plate and let it rest for 15-20 minutes under a tinfoil tent.
  6. After the resting period, transfer the meat to a glass or aluminum baking pan or a roasting pan. Pound the peppercorn to crush, and press them into the meat. Top the roast with 1/2 stick of butter, cut into cubes.
  7. Roast the beef in a preheated oven at 475 degrees for approximately 15 to 20 minutes, or until a meat thermometer gives a temperature reading of just under 140 degrees.
  8. Remove the roast from the oven. Let the meat rest wrapped in foil for at least 30 minutes before slicing.
Notes
  1. This beef is good for sandwiches, or served with rice.
  2. You can opt to make a gravy out of the drippings left in the pan after searing the meat, and in the baking pan after roasting.
By MrsC
Adapted from The Pioneer Woman
At Home With MrsC https://blissbysam.com/

Filed Under: Recipes Tagged With: Recipe, Roast Beef, Roasted Beef Tenderloin

Recipe: Chicken Menudo Made With Love

May 8, 2014 by MrsC | Patricia Cuyugan 22 Comments

I went to the kitchen mid-morning to get water, and I saw ingredients laid out. I asked my mom what she was planning to make and she said Chicken Menudo. I stopped her right there and said that I was gonna take care of preparing lunch.

No one, and I mean no one loves menudo in this house more than I do. I believe that the most important ingredient that goes into any successful dish is love. Because I have lotsa love to give for this dish, I knew that it had to be me in that kitchen. I mean, I don’t think that you could look at the finished product and tell me that I’m not right. I know you can’t because the love just totally shows.

Diba, made with love? 🙂

It’s actually a really easy recipe to make, and I can say that because to tell you the truth, today was the first time that I ever made menudo. I asked my mom how she used to make it, then I looked for other recipes online. I saw this one, and sort of just combined it with my moms, made a few adjustments on my own, and the rest is tasty history.

I started out with a kilo and a half of cubed chicken breast, plus 1/4 kilo of chicken liver. Even if you don’t like liver, add some. It does wonders for the sauce. Marinate the meat for at least half an hour in soy sauce, vinegar, tomato paste and black pepper.

Chicken pieces that have been chilling in the fridge

While the chicken is marinading, you might want to start sauteing the cubed potatoes and carrots in a little bit of oil. Cook them just enough so that they begin to become tender, but not too much that they get too soft and fall apart in the sauce later on. This significantly cuts the cooking time of the menudo so that you don’t overcook the chicken.

Pre-cooking the potatoes and carrots

After 30 minutes in the fridge, the chicken is good to go. So you saute garlic and onions in the same pot or wok you used to precook the other veggies. Add in the chicken and the marinade and simmer for about 10 minutes, or until all the pieces are completely cooked. Stir this occasionally.

Lots of garlic and onions – a must for me when cooking

Add carrots, potatoes, bell peppers and peas. Mix, mix. Throw in some red hotdogs, sliced so that they look like coins. This is optional, but in my world menudo makes no sense without hotdogs in it. Then, add the tomato sauce and water. Finally, add 2 tablespoons of sugar, and salt and pepper to taste. Stir up everything in the pot and simmer until the sauce thickens.

My big pot of happiness

Once the sauce is as thick as you like, which is most likely around the time that the chicken liver starts to melt into it, you are done. All you need now is some fluffy steamed rice.

Ready to eat!

I’m so glad I made a big batch coz that means that we can have this again for lunch tomorrow. Yay!

MrsC's Chicken Menudo
2014-05-08 07:22:18
Write a review
Save Recipe
Print
Ingredients
  1. 1.5 kilos chicken, cubed
  2. 1/5 kilo chicken liver
  3. 1/4 cup tomato paste
  4. 2 tbsp white vinegar
  5. 1/2 cup soy sauce
  6. 1/4 tbsp black pepper
  7. 1 onion, chopped
  8. 5 cloves of garlic, minced
  9. 1 large carrot, cubed
  10. 1 large potato, cubed
  11. 1 red bell pepper, sliced into squares
  12. 1/2 cup green peas
  13. 3 jumbo sized red hotdogs, cut into circles
  14. 2 cups tomato sauce
  15. 1/2 cup water
  16. 2 tbsp sugar
  17. Salt and pepper to taste
  18. Cooking oil
Instructions
  1. Combine tomato paste, vinegar, soy sauce and pepper. Pour over chicken cubes and liver, and marinate in the refrigerator for at least 30 minutes.
  2. Fry cubed potatoes and carrots in a little bit of oil until tender, but still firm.
  3. In the same pot or wok, saute garlic and onions.
  4. Add the marinaded chicken and liver pieces, as well as the marinade. Simmer for about 10 minutes, or until the chicken pieces are completely cooked. Stir occasionally.
  5. Add potatoes, carrots, peas, and bell peppers. After a few minutes, add the hotdog slices.
  6. Pour in the tomato sauce and 1/2 cup of water. Add sugar.
  7. Season with salt and pepper to taste. Then, allow to simmer until the sauce thickens.
  8. Serve menudo over steamed rice.
Notes
  1. You can also opt to add raisins for a little bit of sweetness, but I would rather not have them in this dish.
By MrsC
Adapted from Lucky Mom's Recipe
At Home With MrsC https://blissbysam.com/
I would love to hear how this recipe turns out for you, in case you decide to try making it at home! Hope your family loves it as much as mine did.

Filed Under: Recipes Tagged With: Chicken Menudo, cooking, Filipino Food, Menudo, Recipe

Recipe: Baked French Toast With Cinnamon Sugar Topping

April 10, 2014 by MrsC | Patricia Cuyugan 17 Comments

I promised this recipe to a bunch of people last week, and I’m really sorry that I haven’t been able to post it until today. Last week was quite a challenge, as you know if you follow me on social media. (If you don’t, please do here, here and here.)

Instagrammed!


Anyway, better late than never, as I always say. Here’s a recipe for a super yummy and sweet breakfast treat, Baked French Toast with Cinnamon Sugar Topping. This is perfect with a mug of coffee, so start your day right by brewing some!

The best way to start the morning

Preheat your oven to 350 degrees. Grease a 9×9″ glass baking pan with cooking spray or butter. Use unsalted if you don’t want to have a salty crust on your French toast. Then, tear up about 5 cups of bread and arrange the pieces inside the pan. I used an assortment of regular loaf, whole wheat loaf and pandesal. I like to store bread in the freezer, and this dish is a great way to use up that stash.

I really had fun tearing up these bread pieces

In a bowl, whisk together 5 eggs (1 egg for each cup of bread), 2 cups of whole milk, 1/2 cup each of brown and white sugar, and 2 tablespoons of vanilla.

French toast basics: Eggs and milk

Yes, this is another fattening recipe, I’m afraid.

There’s no such thing as too much sugar

Pour the custard over the bread, making sure that each piece is moistened. I like to press the bread down, bringing some of the liquid up to the top. Refrigerate for a few minutes and allow to soak.

While this is happening, combine 1/3 cup each of flour and brown sugar , plus 1 teaspoon of cinnamon and 1/4 teaspoon of salt in a separate bowl. 

Dry ingredients for the crumb topping

Take a stick of cold butter (must be cold, this is important), and mash it into the flour and sugar mixture until little pebbles are formed. Try your best to keep this cold, otherwise you will end up with boulders instead of pebbles. Again, if you don’t want this to be too salty, use unsalted butter. Or you can also opt not to add more salt to the mix.

See, my butter ended up warming up faster than I wanted it to, so I had rather large pebbles

Sprinkle topping over the entire casserole. Then, pop in the oven to bake. If you want the finished product to be soft and squishy, keep this in the oven for 30-35 minutes. For a more firm, slightly dryer French toast casserole, bake for 40-45 minutes.

One last look before going into the oven

That’s it! This is really nice eaten warm, but also good when cold. Next time, I’ll try to make a version with apples in it. Yum! Oh, one last note, this recipe is a cross between The Pioneer Woman, Rachel Ray, and one more recipe I found online that I cannot remember anymore. Enjoy!

Baked French Toast with Cinnamon Sugar Topping
2014-04-10 07:46:04
French toast, done differently.
Write a review
Save Recipe
Print
Ingredients
  1. 5 cups torn up bread
  2. 2 cups whole milk
  3. 5 eggs
  4. 1/2 cup brown sugar
  5. 1/2 cup white sugar
  6. 2 tbsp vanilla
For the topping
  1. 1 stick butter
  2. 1/3 cup flour
  3. 1/3 cup brown sugar
  4. 1 tsp ground cinnamon
  5. 1/4 tsp salt
Instructions
  1. Preheat oven to 350 degrees.
  2. Grease the bottom and sides of a 9x9" glass baking pan with butter or cooking spray. Arrange the torn bread pieces in the pan.
  3. In a bowl, make a custard by whisking together the milk, eggs, sugars and vanilla.
  4. Pour custard over the bread, making sure that each piece is moistened. Refrigerate and allow to soak. You can actually prepare ahead up to this point and let the casserole soak overnight.
Prepare the topping
  1. Combine flour, brown sugar, cinnamon and salt in a bowl.
  2. Mash cold butter into the dry ingredients using a fork to form pebbles.
  3. Sprinkle the topping over the soaked bread.
Bake uncovered for
  1. 30-35 minutes if you want a soft and squishy consistency, 40-45 minutes if you want your French toast to be more firm.
Notes
  1. Enjoy!
By Mrs C
Adapted from assorted online recipes
At Home With MrsC https://blissbysam.com/

Filed Under: Recipes Tagged With: Baked French Toast, Breakfast, Cinnamon Sugar Topping, Dessert, French Toast, French Toast Casserole, Recipe

  • « Go to Previous Page
  • Go to page 1
  • Go to page 2
  • Go to page 3
  • Go to page 4
  • Go to page 5
  • Go to Next Page »

Welcome to my online home

Hi, I'm MrsC, a happy wife and mom, a help-less but not helpless homemaker, who is learning to live simply in this complicated world.

Copyright © 2025 · Twenty Seven Pro on Genesis Framework · WordPress