• Skip to primary navigation
  • Skip to main content
  • Skip to primary sidebar

At Home With MrsC

Raising a family, making a home.

  • Home
  • About Me
  • Contact
  • Guest Post

Recipes

Recipe: MrC’s Birthday Roast Beef

June 5, 2014 by MrsC | Patricia Cuyugan 14 Comments

First of all, I have to apologize to those of you who were waiting for this week’s baon plan. I just found out at school orientation this morning that classes will only run for half the day on the first week of school, so the little boy will actually be eating lunch at home. Toinks. So, since there won’t be any baon preps this coming week, I’ve decided to push back my lunchbox plan posting by a week. Thanks for understanding, you guys!

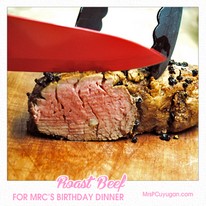
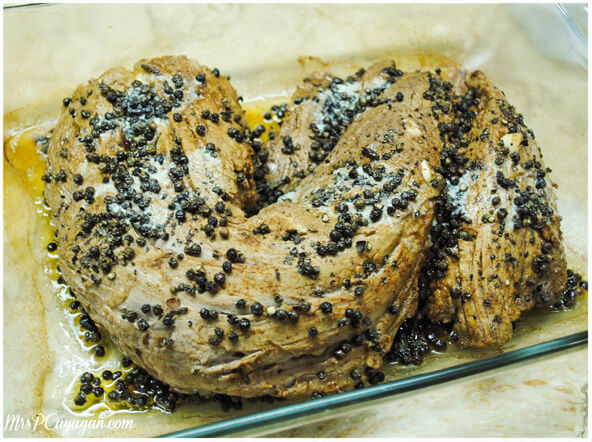
I will share a recipe today, though, one that I know some of you have been waiting for. I got super rave reviews from our family for the roast beef that I prepared for MrC’s birthday last May. It’s a really easy recipe, to tell you the truth. Still, it was the first time that I had ever made roast beef, and I was a little worried that I might kill the expensive piece of beef that we had purchased. Well, it turned out amazing. The photo below says it all.

Roast beef!
Roast beef!


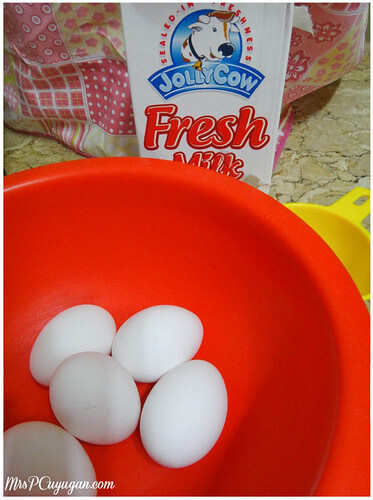
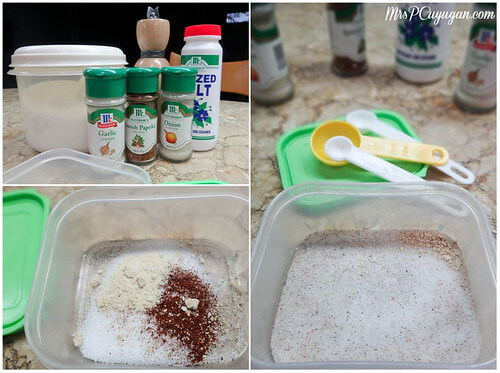
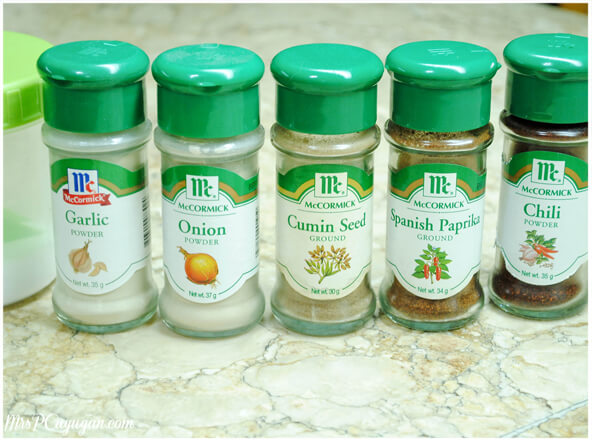
It’s all in the ingredients!

If there’s one super crucial thing I have to stress about achieving roast beef success, it’s this – buy quality ingredients. This is one of those dishes that you will really want to splurge on, and it all begins with an excellent cut of beef. You don’t necessarily need to go imported and super expensive here, too. The piece of meat I used actually came from Tenderbites in Makati Supermarket. Try to get fresh and not frozen meat, and yes this will make a big difference in the tenderness and juiciness of the roast beef.

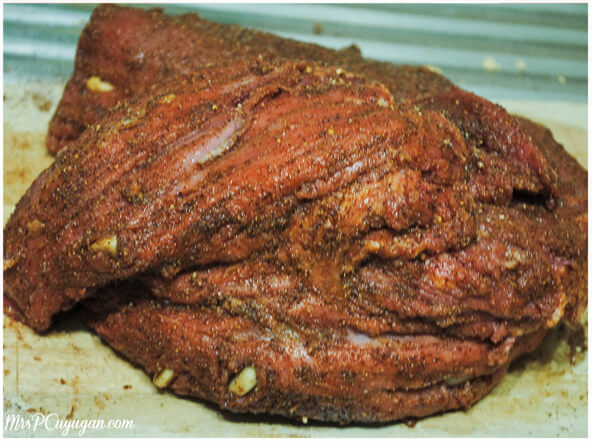
One more thing you need to remember to do is be generous with your seasoning. Remember that everything just sits on the utside of the meat, and that there is a chance that none of the flavor will really seep through all the way to the core. So, best to be certain that the surface of the meat is completely covered in the dry rub, and that you don’t scrimp on salt, pepper, garlic and butter. It may seem like a lot, but trust me, it’s just right.


Start by prepping the beef

Washed beef with slits for garlic slivers

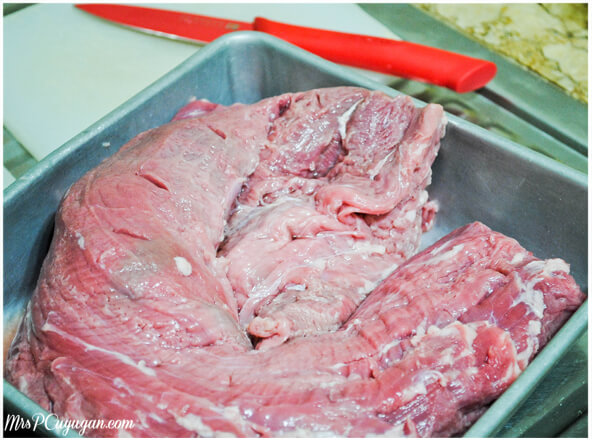
 The first thing you need to do is wash your meat. You will want to get whatever slippy slimy stuff there is off of the surface. You will also want to trim off any excess fat and litid off as well. Don’t take all the fat off, though. That will help keep the roast beef tender. After washing, take a thin, super sharp knife and poke slits into the beef. This is where you will insert your garlic slivers. Make sure that the slits are deep enough – about an inch into the meat, and evenly spaced out. It’s totally up to you how much garlic you want to put, but in my opinion, more garlic = more fun.

More garlic, more fun

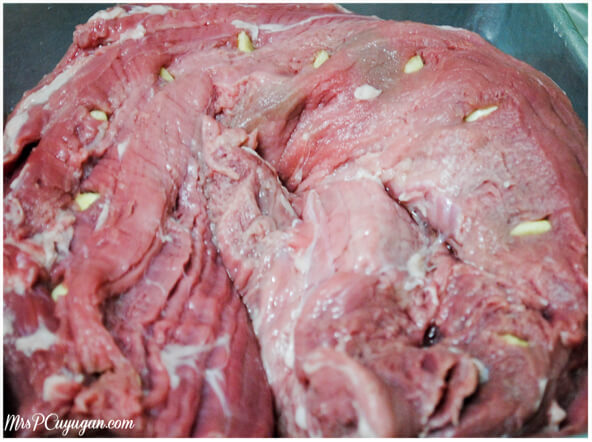
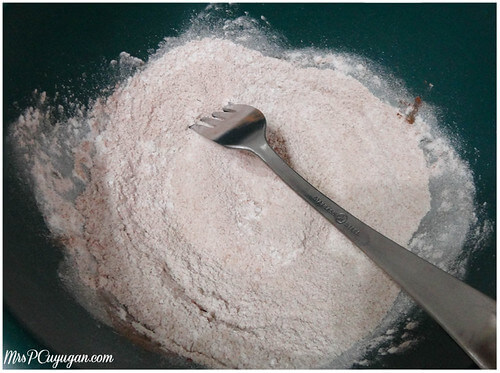
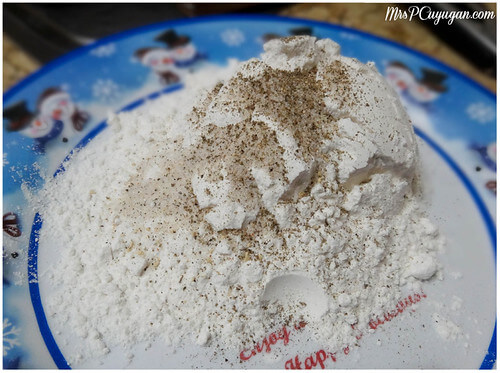
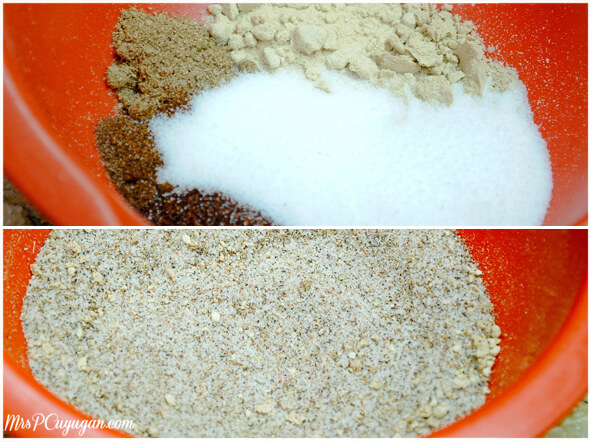
I actually let the meat sit in the fridge for about half an hour after I put the garlic in. I really don’t know if it made any difference in the taste, but I will do that again next time to check. While the meat is (literally) chilling, I mix up the rub. The inspiration for this rub came from this roast tenderloin recipe by The Pioneer Woman.

Here’s what’s in the rub

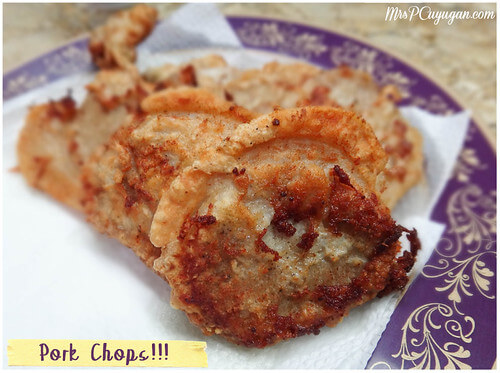
Again, this may look like a lot of salt, it really was just enough to season the nearly 2-kilo piece of tenderloin that I cooked. Next time I think I will measure out an extra batch of this, because I can totally use it as seasoned salt for things like pork chops and fried chicken. 

Measure and mix

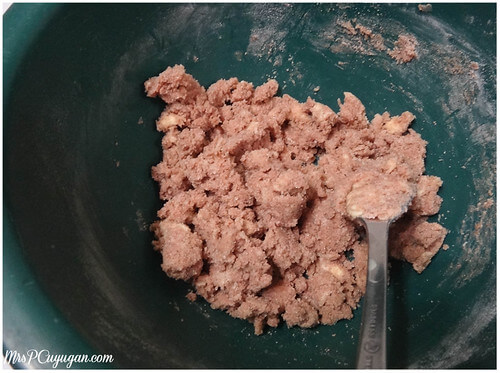
With your hands, rub the seasoned salt into the meat. Don’t squeeze the beef so that none of the juices and garlic bits come out. Instead, just make as if you are giving your tenderloin a body scrub. Make sure you cover the entire surface of the meat.

After the salt rub

At this point, you will need to sear the beef. This gives it a nice brown color, and also helps to seal in the yummy juices. Honestly, I could have been smarter about how I did this step. See, the tenderloin we bought was pretty long. I could have opted to cut it into two or three smaller pieces to make it easier to manage. But no, I decided I would keep it whole, and would just adjust its position inside the pan to make sure that the meat is seared evenly. 

Seared in olive oil and butter

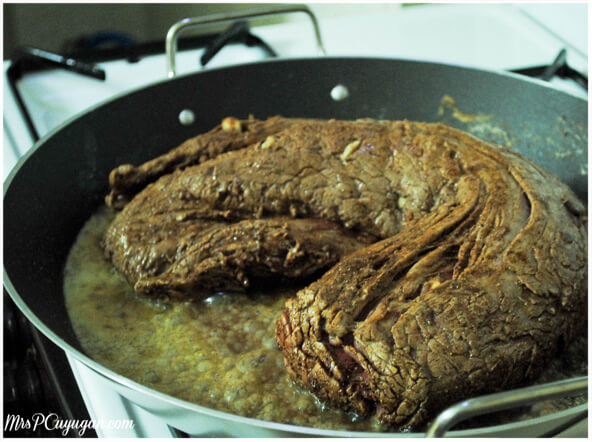
As you can see, that is a pretty big piece of meat. It didn’t fit into any of our pans and skillets, so I used a paella pan. This is seared in olive oil and butter, with the butter idea coming from Pioneer Woman as well. The butter gives the beef a golden brown color, and also adds a whole lot to the flavor of this roast.

Resting under a tinfoil tent

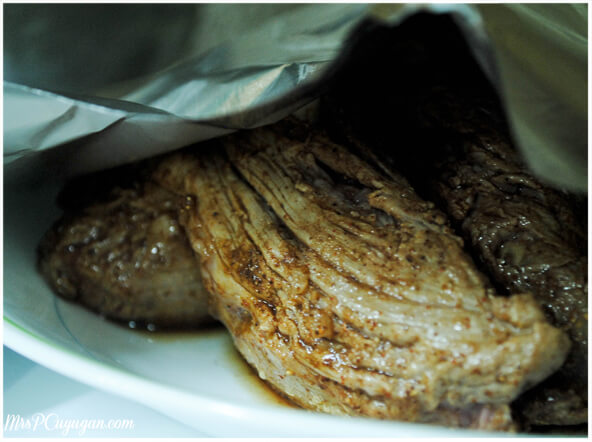
After searing, it’s time for the meat to rest. Put it on a plate and cover it loosely with a tinfoil tent. The resting allows the juices inside the beef to redistribute themselves evenly. I suggest that you take the opportunity to rest as well. 15 minutes is enough time for a quick shower, and I’m pretty sure you’ll be wanting one by now if you are cooking in the crazy Manila heat.


Time to Roast

Prepare to roast!

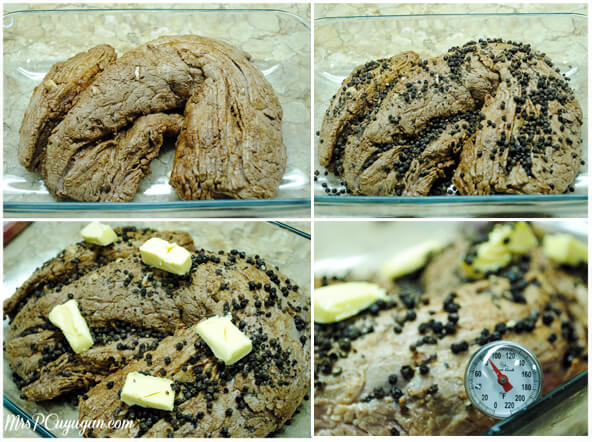
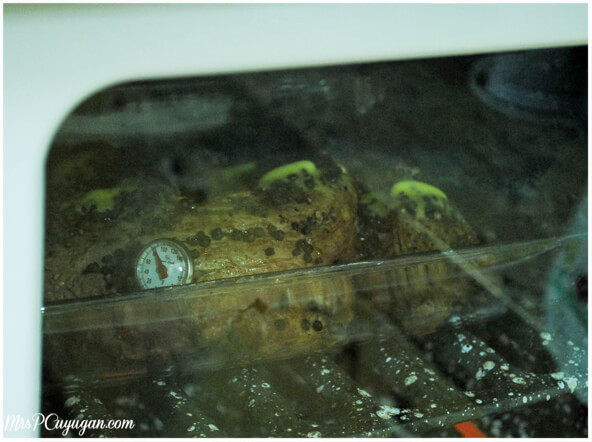
After resting for 215-20 minutes, the beef is ready for roasting. Preheat your oven to 475 degrees. Transfer the beef into an aluminum or glass baking pan. I use glass so that I can see what’s going on. Smash up some peppercorns and press the bits onto the beef. Then, top the meat with cubes of butter. I know, it doesn’t sound very good for you, but it is good.

Finally, stick a meat thermometer into the thickest part of the meat. This matters, because the internal temperature will determine the doneness of your roast. If you like yours on the more well done side, then you can totally skip this part and just time your cooking. But, if your aim is to have it perfectly pink inside, you need the thermometer. Fair enough?

Keep an eye on that thermometer

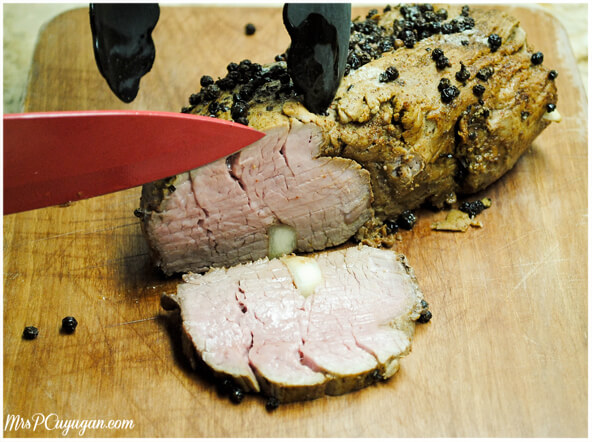
Take your meat out right before it hits 140 degrees. Do not slice this right away. Yes, you will need to let it rest again. If you slice now all of its juices are gonna end up on your cutting board and you will end up with dry, tough beef. Cover the meat with foil while it sits.

Fresh out of the oven

When you finally cut this up and put a piece in your mouth, it will totally be worth the wait. Remember to cut with a sharp knife. Nothing ruins a good roast better than a dull knife. I always turn to my brother for cutting and carving. Not only is he good at it, he loves doing it, too.

Perfection

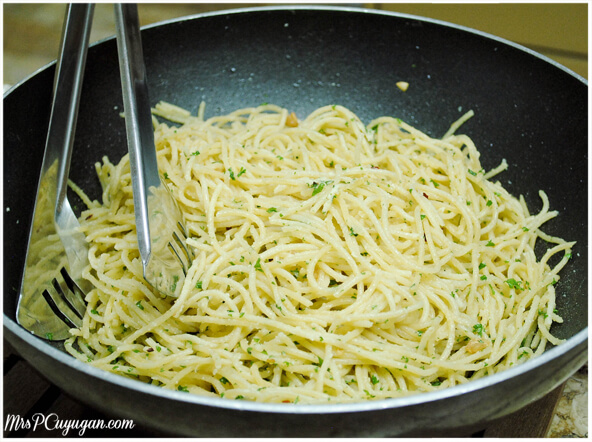
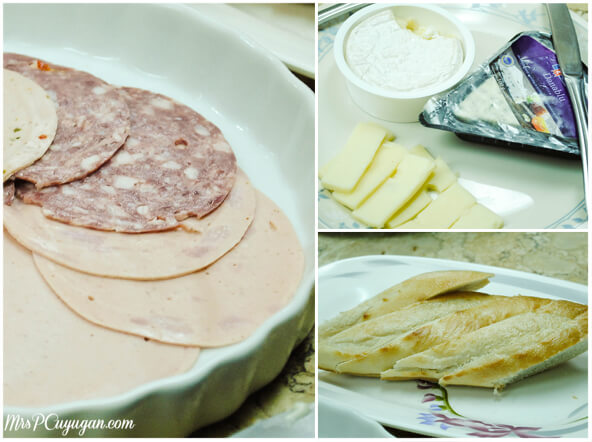
I served this up with a spaghetti aglio olio. We also had warm french bread, which was perfect for mopping up the peppery butter and drippings that were lying at the bottom of the baking pan.

Sharing the recipe for this light and fresh pasta dish soon

We also prepared a platter of cold cuts and some of MrC’s favorite cheeses for everyone to munch on while we were cutting up the beef. Since it was a celebration, we also had a nice bottle of red wine. It was such a nice dinner, and I’m pretty sure I outdid the meal I prepared for MrC’s birthday last year.

Cold cuts, cheeses and french bread

I love that I get to prepare these labor of love meals for my husband’s birthday. He loves to eat, and he enjoys the food, so I’m all the more encouraged to come up with a yummy feast. Honestly, with the way this spread turned out, the pressure is so on for next year.

Of all things, what we forgot to get was a birthday candle!
MrC's Birthday Roast Beef
2014-06-05 06:56:19
Write a review
Save Recipe
Print
Ingredients
  1. 1.5-2kg Beef Tenderloin
  2. Half a head of garlic, peeled and cut into slivers
  3. 2 tsp Salt
  4. 1/2 tsp Onion Powder
  5. 1/2 tsp Garlic Powder
  6. 1/2 tsp Cumin
  7. 1/2 tsp Paprika
  8. 1/2 tsp Chili Powder
  9. Olive oil for frying
  10. 1/2 stick + 2 tbsp Salted Butter
  11. 1/4 cup Whole Peppercorn
Instructions
  1. Wash the meat and pat dry. Trim off any excess fat and muscle from the beef's surface.
  2. Slice 1" deep, evenly-spaced slits into the meat. Insert a garlic sliver into each slit. Let the meat sit in the refrigerator for half an hour.
  3. Prepare the dry rub my combining 2 tsp salt with the remaining spices in a bowl. Rub the mixture all over the surface of the beef, making sure that it is completely coated.
  4. Heat olive oil in a large skillet. Add 2 tbsp of butter into the oil. Sear the beef on all sides. This should take anywhere between 8-10 minutes, just until the meat is brown on the surface. Do not overcook.
  5. Transfer the beef to a plate and let it rest for 15-20 minutes under a tinfoil tent.
  6. After the resting period, transfer the meat to a glass or aluminum baking pan or a roasting pan. Pound the peppercorn to crush, and press them into the meat. Top the roast with 1/2 stick of butter, cut into cubes.
  7. Roast the beef in a preheated oven at 475 degrees for approximately 15 to 20 minutes, or until a meat thermometer gives a temperature reading of just under 140 degrees.
  8. Remove the roast from the oven. Let the meat rest wrapped in foil for at least 30 minutes before slicing.
Notes
  1. This beef is good for sandwiches, or served with rice.
  2. You can opt to make a gravy out of the drippings left in the pan after searing the meat, and in the baking pan after roasting.
By MrsC
Adapted from The Pioneer Woman
At Home With MrsC https://blissbysam.com/

Filed Under: Recipes Tagged With: Recipe, Roast Beef, Roasted Beef Tenderloin

Recipe: Chicken Menudo Made With Love

May 8, 2014 by MrsC | Patricia Cuyugan 22 Comments

I went to the kitchen mid-morning to get water, and I saw ingredients laid out. I asked my mom what she was planning to make and she said Chicken Menudo. I stopped her right there and said that I was gonna take care of preparing lunch.

No one, and I mean no one loves menudo in this house more than I do. I believe that the most important ingredient that goes into any successful dish is love. Because I have lotsa love to give for this dish, I knew that it had to be me in that kitchen. I mean, I don’t think that you could look at the finished product and tell me that I’m not right. I know you can’t because the love just totally shows.

Diba, made with love? 🙂

It’s actually a really easy recipe to make, and I can say that because to tell you the truth, today was the first time that I ever made menudo. I asked my mom how she used to make it, then I looked for other recipes online. I saw this one, and sort of just combined it with my moms, made a few adjustments on my own, and the rest is tasty history.

I started out with a kilo and a half of cubed chicken breast, plus 1/4 kilo of chicken liver. Even if you don’t like liver, add some. It does wonders for the sauce. Marinate the meat for at least half an hour in soy sauce, vinegar, tomato paste and black pepper.

Chicken pieces that have been chilling in the fridge

While the chicken is marinading, you might want to start sauteing the cubed potatoes and carrots in a little bit of oil. Cook them just enough so that they begin to become tender, but not too much that they get too soft and fall apart in the sauce later on. This significantly cuts the cooking time of the menudo so that you don’t overcook the chicken.

Pre-cooking the potatoes and carrots

After 30 minutes in the fridge, the chicken is good to go. So you saute garlic and onions in the same pot or wok you used to precook the other veggies. Add in the chicken and the marinade and simmer for about 10 minutes, or until all the pieces are completely cooked. Stir this occasionally.

Lots of garlic and onions – a must for me when cooking

Add carrots, potatoes, bell peppers and peas. Mix, mix. Throw in some red hotdogs, sliced so that they look like coins. This is optional, but in my world menudo makes no sense without hotdogs in it. Then, add the tomato sauce and water. Finally, add 2 tablespoons of sugar, and salt and pepper to taste. Stir up everything in the pot and simmer until the sauce thickens.

My big pot of happiness

Once the sauce is as thick as you like, which is most likely around the time that the chicken liver starts to melt into it, you are done. All you need now is some fluffy steamed rice.

Ready to eat!

I’m so glad I made a big batch coz that means that we can have this again for lunch tomorrow. Yay!

MrsC's Chicken Menudo
2014-05-08 07:22:18
Write a review
Save Recipe
Print
Ingredients
  1. 1.5 kilos chicken, cubed
  2. 1/5 kilo chicken liver
  3. 1/4 cup tomato paste
  4. 2 tbsp white vinegar
  5. 1/2 cup soy sauce
  6. 1/4 tbsp black pepper
  7. 1 onion, chopped
  8. 5 cloves of garlic, minced
  9. 1 large carrot, cubed
  10. 1 large potato, cubed
  11. 1 red bell pepper, sliced into squares
  12. 1/2 cup green peas
  13. 3 jumbo sized red hotdogs, cut into circles
  14. 2 cups tomato sauce
  15. 1/2 cup water
  16. 2 tbsp sugar
  17. Salt and pepper to taste
  18. Cooking oil
Instructions
  1. Combine tomato paste, vinegar, soy sauce and pepper. Pour over chicken cubes and liver, and marinate in the refrigerator for at least 30 minutes.
  2. Fry cubed potatoes and carrots in a little bit of oil until tender, but still firm.
  3. In the same pot or wok, saute garlic and onions.
  4. Add the marinaded chicken and liver pieces, as well as the marinade. Simmer for about 10 minutes, or until the chicken pieces are completely cooked. Stir occasionally.
  5. Add potatoes, carrots, peas, and bell peppers. After a few minutes, add the hotdog slices.
  6. Pour in the tomato sauce and 1/2 cup of water. Add sugar.
  7. Season with salt and pepper to taste. Then, allow to simmer until the sauce thickens.
  8. Serve menudo over steamed rice.
Notes
  1. You can also opt to add raisins for a little bit of sweetness, but I would rather not have them in this dish.
By MrsC
Adapted from Lucky Mom's Recipe
At Home With MrsC https://blissbysam.com/
I would love to hear how this recipe turns out for you, in case you decide to try making it at home! Hope your family loves it as much as mine did.

Filed Under: Recipes Tagged With: Chicken Menudo, cooking, Filipino Food, Menudo, Recipe

Recipe: Baked French Toast With Cinnamon Sugar Topping

April 10, 2014 by MrsC | Patricia Cuyugan 17 Comments

I promised this recipe to a bunch of people last week, and I’m really sorry that I haven’t been able to post it until today. Last week was quite a challenge, as you know if you follow me on social media. (If you don’t, please do here, here and here.)

Instagrammed!


Anyway, better late than never, as I always say. Here’s a recipe for a super yummy and sweet breakfast treat, Baked French Toast with Cinnamon Sugar Topping. This is perfect with a mug of coffee, so start your day right by brewing some!

The best way to start the morning

Preheat your oven to 350 degrees. Grease a 9×9″ glass baking pan with cooking spray or butter. Use unsalted if you don’t want to have a salty crust on your French toast. Then, tear up about 5 cups of bread and arrange the pieces inside the pan. I used an assortment of regular loaf, whole wheat loaf and pandesal. I like to store bread in the freezer, and this dish is a great way to use up that stash.

I really had fun tearing up these bread pieces

In a bowl, whisk together 5 eggs (1 egg for each cup of bread), 2 cups of whole milk, 1/2 cup each of brown and white sugar, and 2 tablespoons of vanilla.

French toast basics: Eggs and milk

Yes, this is another fattening recipe, I’m afraid.

There’s no such thing as too much sugar

Pour the custard over the bread, making sure that each piece is moistened. I like to press the bread down, bringing some of the liquid up to the top. Refrigerate for a few minutes and allow to soak.

While this is happening, combine 1/3 cup each of flour and brown sugar , plus 1 teaspoon of cinnamon and 1/4 teaspoon of salt in a separate bowl. 

Dry ingredients for the crumb topping

Take a stick of cold butter (must be cold, this is important), and mash it into the flour and sugar mixture until little pebbles are formed. Try your best to keep this cold, otherwise you will end up with boulders instead of pebbles. Again, if you don’t want this to be too salty, use unsalted butter. Or you can also opt not to add more salt to the mix.

See, my butter ended up warming up faster than I wanted it to, so I had rather large pebbles

Sprinkle topping over the entire casserole. Then, pop in the oven to bake. If you want the finished product to be soft and squishy, keep this in the oven for 30-35 minutes. For a more firm, slightly dryer French toast casserole, bake for 40-45 minutes.

One last look before going into the oven

That’s it! This is really nice eaten warm, but also good when cold. Next time, I’ll try to make a version with apples in it. Yum! Oh, one last note, this recipe is a cross between The Pioneer Woman, Rachel Ray, and one more recipe I found online that I cannot remember anymore. Enjoy!

Baked French Toast with Cinnamon Sugar Topping
2014-04-10 07:46:04
French toast, done differently.
Write a review
Save Recipe
Print
Ingredients
  1. 5 cups torn up bread
  2. 2 cups whole milk
  3. 5 eggs
  4. 1/2 cup brown sugar
  5. 1/2 cup white sugar
  6. 2 tbsp vanilla
For the topping
  1. 1 stick butter
  2. 1/3 cup flour
  3. 1/3 cup brown sugar
  4. 1 tsp ground cinnamon
  5. 1/4 tsp salt
Instructions
  1. Preheat oven to 350 degrees.
  2. Grease the bottom and sides of a 9x9" glass baking pan with butter or cooking spray. Arrange the torn bread pieces in the pan.
  3. In a bowl, make a custard by whisking together the milk, eggs, sugars and vanilla.
  4. Pour custard over the bread, making sure that each piece is moistened. Refrigerate and allow to soak. You can actually prepare ahead up to this point and let the casserole soak overnight.
Prepare the topping
  1. Combine flour, brown sugar, cinnamon and salt in a bowl.
  2. Mash cold butter into the dry ingredients using a fork to form pebbles.
  3. Sprinkle the topping over the soaked bread.
Bake uncovered for
  1. 30-35 minutes if you want a soft and squishy consistency, 40-45 minutes if you want your French toast to be more firm.
Notes
  1. Enjoy!
By Mrs C
Adapted from assorted online recipes
At Home With MrsC https://blissbysam.com/

Filed Under: Recipes Tagged With: Baked French Toast, Breakfast, Cinnamon Sugar Topping, Dessert, French Toast, French Toast Casserole, Recipe

Recipe: Pork Chops!

March 27, 2014 by MrsC | Patricia Cuyugan 41 Comments

Say it with me, people… Pork chops!!!

Obviously, I get excited over pork chops. So excited, actually, that I had some tonight. Eep, yes, I am ashamed to admit that I broke my  meatless Lenten promise. I feel regret in my guilty conscience, but my belly is quite happy. I promise to go back to regular pescatarian programming tomorrow, but first let me tell you about these fab chops.

First of all, I ended up cooking too many. That’s because mom said that my original plan to cook only the 1/4 kilo of butterfly pork chops I bought from the store wasn’t gonna be enough for dinner for everyone. So she threw in a few pieces of skinless pork chops, too. Then my dad and brother ended up not having dinner. And so we had a lot left over.

Pork Chops!!!

I, surprisingly, had the foresight to put away the cooked butterflied chops instead of serving them. So now I have enough for a meaty recycled and revamped dish for the boys’ lunch tomorrow. I will probably end up making a mushroom sauce and just throwing the chops in. Sounds like a plan.

So, back to the pork chops. First, we make seasoned salt. This is used to add flavor to the flour that we will use for dredging. I actually picked this up from The Pioneer Woman’s Pan-Fried Pork Chops recipe because it makes lots of sense. Flour alone would be dull and tasteless. Flour + seasoned salt, on the other hand, is just pure yum.

Make your own seasoned salt

Just combine 1/2 tbsp salt, 1/2 tsp sugar, and 1/8 tsp each of onion powder, garlic powder and paprika. That is all. I like to dump everything into a small food keeper, then seal and shake it violently for a few seconds. It’s easier than stirring in vain with a fork or teaspoon, plus, in case you make too much seasoned salt you don’t need to transfer it to a storage container. Less stuff to wash afterwards. When you’re done making this, set it aside for a while and proceed to rinse your meat.

Clean!

 I rinse it to remove excess blood from the meat and to get rid of whatever sliminess there is on the surface. After rinsing, season each chop thoroughly with salt and pepper on both sides. 

My seasoned chops, all in two rows

On a clean plate, mix together 1/2 cup of flour, 1 tsp black pepper and 1 tsp of your seasoned salt. Use a fork to swish everything together. Then, coat each pork chop generously with the flour mixture, shake off the excess and toss them into a pan with enough oil to cover the meat.

For dredging: Flour + seasoned salt + black pepper

Another tip I got from The Pioneer Woman is to add a tablespoon or two of butter into the oil for frying. It helps to achieve a nice golden brown color on the cooked chops. Wait, you didn’t think that this would be healthy, did you?

Side a.
This is the golden brown you are looking for.

You want to cook the meat for about 3-5 minutes on the first side, then flip. Cook for 2 more minutes or so on side b. I turn it a couple more times after that just to make sure that I’ve got the golden brown color that I want. Yup, I’m restless with my tongs!

Once the meat is cooked through, take each chop out and place on a plate lined with paper towels to absorb the excess oil. 

Done!

That is it. I like these with rice and Mang Tomas All Around Sarsa, plus a little bit of chopsuey on the side. Yum. There you have it, the pork chops that made me break my meat-free Lenten promise. This was a hit with the boys and with lola, and I hope it will be a hit with your dinner crowd, too.

Pork Chops!!!
2014-03-27 07:47:28
Really easy but really yummy fried pork chops.
Write a review
Save Recipe
Print
Ingredients
  1. 1/2 kilo Skinless pork chops or butterflied pork chops
  2. 1/2 tablespoon Salt, plus extra for seasoning meat
  3. 1/2 teaspoon Sugar
  4. 1/8 teaspoon Onion powder
  5. 1/8 teaspoon Garlic powder
  6. 1/8 teaspoon Spanish paprika
  7. 1/2 cup All purpose flour
  8. 1 teaspoon Black pepper, plus extra for seasoning meat
  9. Cooking oil for frying
  10. 1 tablespoon Salted butter
Instructions
  1. Make the seasoned salt by combining 1 tablespoon of salt with the sugar, onion powder, garlic powder and paprika. Set aside.
  2. Rinse pork chops and pat dry with paper towels.
  3. Season both sides of the prepared pork chops with salt and pepper.
  4. Combine all purpose flour, 1 teaspoon of the seasoned salt mixture and 1 teaspoon of black pepper on a plate. Mix well using a fork.
  5. Heat enough cooking oil to cover the pieces of meat. Add a tablespoon of butter into the oil. Keep the stove on medium high.
  6. Dredge each chop with enough flour to form a thick, firm coating. Shake off the excess flour.
  7. Arrange the chops, three at a time, in the pan with hot oil. You may opt to cook more or less chops at a time, depending on the size of your pan.
  8. Cook the first side for about 3 to 5 minutes. Flip, and cook the second side for about 2 more minutes.
  9. You will know that the pork chops are done when there is no more blood or pink juice oozing out of the meat. You should also end up with a nice golden brown color once cooked.
Notes
  1. Remember to regulate the heat of your stove as needed. If the oil is too hot, the flour coating will burn before the pork is cooked through.
By Mrs C
Adapted from The Pioneer Woman
At Home With MrsC https://blissbysam.com/
As always, please tell me if you get to try this recipe at home. Happy cooking, and happy eating!

Filed Under: Recipes Tagged With: cooking, Fried, Pork Chop, Recipe

A Week Without A Plan + A Recipe for Glazed Tuna Steaks

March 13, 2014 by MrsC | Patricia Cuyugan 15 Comments

My mom and I spent nearly 3 hours walking around S&R today, checking out what was already marked down, pre-Member’s Sale. What we found to be a real bargain were giant cans of diced tomatoes and whole peeled tomatoes that we got for making pasta and other tomato sauce based dishes. We purchased a few other random things, plus some pizza and chowder to eat, and then we went home, tired but happy.

I was supposed to go to the supermarket today to figure out what to prepare for the boys’ lunch boxes next week,  but instead I decided to spend leisure time with my mom in one of our favorite places. Because of this, it looks like next week is going to be a week without a plan, a meal plan, that is. Now, I figured, this happens to everyone, and it’s a good exercise in thinking on your feet in the kitchen. Right? I do have a security blanket of smoked fish, tocino, enough ingredients for a pot of adobo, and a bunch of other things in the freezer and pantry. We will survive. It’s just that I don’t have a meal plan or grocery list to share with you this week.

I do have a recipe though, and a really good one too. It’s Lent-friendly, pretty healthy, and super easy to prepare. Ready?

MrsC's Honey Balsamic Glazed Tuna
2014-03-13 03:58:39
Baked tuna steaks with a sweet and tangy glaze
Write a review
Save Recipe
Print
Ingredients
  1. 2 large tuna steaks
  2. 1 tbsp salt
  3. 1/2 tsp pepper
  4. 1/4 tbsp yellow mustard
  5. 1/4 cup honey
  6. 1/4 cup balsamic vinegar
  7. 1/2 tsp dried rosemary, or 2 sprigs fresh
  8. Olive oil
Instructions
  1. Wash the tuna steaks well, and pat dry with paper towels. Rub with salt and pepper on all sides.
  2. Grease the bottom of an aluminum or glass baking pan with olive oil. Place the tuna steaks onto the pan.
  3. Mix together the mustard, honey, balsamic vinegar and rosemary, and pour over the tuna. Make sure that all surfaces of the fish are coated, and let the whole thing marinade for about an hour, refrigerated.
  4. Preheat oven to 400 degrees. Bake the fish for 25-30 minutes, or until cooked through. The sauce should end up thick and syrupy.
  5. Enjoy!
Notes
  1. When using frozen fish, defrost the steaks in the refrigerator first before marinading.
  2. Dried rosemary can be a hassle to chew on, so try to brush these herbs off of the fish before serving.
  3. For extra yum, brush the thickened glaze onto the cooked fish right when you serve this dish.
  4. Best eaten with cauliflower or broccoli salad, or even just steamed vegetables.
By MrsC
At Home With MrsC https://blissbysam.com/
This fish is obviously a Friday dish. To find out what I’ll be packing for the rest of the week’s lunches, please follow me on Instagram. I’m sure to post there. I’m thinking I’ll cook chicken adobo over the weekend and that can be for Monday. I’ll save some of the chicken to use for fried chicken on Tuesday. Wednesday can be the smoked fish, and Thursday tocino. Then somewhere between then and now, I should get my butt to the grocery store and prepare for the following week. Sounds good?

In these last two weeks of school that are coming up, it’s obviously going to be a struggle for me to stay organized and focused. Seriously, I can taste summer already. Or maybe it’s more like I can feel summer already. My rashes from the heat are proof! Argh.

Let me know if you try this fish recipe. I hope you love it as much as I do!


Filed Under: Recipes Tagged With: Cooking at home, Fish dish, Honey Balsamic Glazed Tuna Steaks, Lent friendly food, Meat free meals, Recipe

Sinigang, the Way My Mom Does It

December 18, 2013 by MrsC | Patricia Cuyugan 5 Comments

My mom is one of those people who “eyeballs” things when she cooks. She hates to measure ingredients, so she bases everything on how the food tastes and smells. Because of this, it’s a bit of a challenge learning how to make her specialty dishes. You either need to watch her and figure out the measurements as you go along, or force her to measure before she adds every ingredient, which actually results in the food not tasting the same. Sounds strange, but I’m sure that if you know someone who cooks the same way my mom does, you would totally understand.

My mom prepares really great, homey dishes that everyone just loves. We always joke that she’s great at making people fat because her food is so good, and well, just take a look at our family photo and you’ll see what I mean. My sister is the only skinny person in this household, and even the usually-skinny MrC is slowly but surely becoming a little more huggable. It’s hard to say no to food that comes out of my mom’s kitchen because she’s really mastered the art of comfort food.

One of the best things to come home to after a long day is a hot bowl of sinigang soup. That’s sour tamarind broth, for those who are unfamiliar with this staple Filipino dish. I recently made a big pot of  sinigang with shrimp heads and lots of veggies for my in-laws, but really, my favorite sinigang variant is the pork kind.

MaggiB (1 of 2)
Mommy’s Pork Sinigang

For her soup, my mom uses half a kilo of pork, I think she uses thick cuts of liempo (pork belly) or American Ribs from Monterey. She adds lots of kangkong (water spinach), or pechay Tagalog (bokchoy) when my dad requests for it, labanos (radish) and gabi (taro). She also adds some chopped tomatoes for added color and sourness. If you like your sinigang spicy, you can also add green siling haba (finger chili peppers). I prefer my soup to have a bit of a kick, but my mom likes it mild and child-friendly, so we only put a couple of chili peppers in.

The sourness in the soup comes from adding either tamarind, guava or miso. We like to make thing easy for ourselves at home, though, so we use sinigang mix. Mom and I recently discovered how good Maggi Magic Sinigang is, and so we shifted to that from the brand that we used to use. It’s definitely more flavorful than our old mix, and a lot more sour, just the way I like it.

Preparing this hearty dish is easy. Boil the meat in enough water until it’s soft. Add the tomatoes, then the radish and taro.Continue to boil the soup until the vegetables are cooked. Season with sinigang mix, and adjust the saltiness to your liking using patis (fish sauce), then add the chili peppers. At the very last minute, add the kangkong or pechay, turn off the heat and you’re done.

Sinigang is best enjoyed with steamed rice and a cold glass of Coke.

Feeling adventurous? Try preparing your sinigang with lechon manok (roasted chicken) instead of pork. We had that for dinner last night, and it was really good! The soup gets this fabulously yummy, smoky flavor from the chicken. You can also visit the Maggi website for a Bulalo Sinigang recipe, and other yummy dishes that you can easily make at home. Like Maggi on Facebook too, for more recipes and kitchen tips.

Happy eating!

SignatureNew

Filed Under: Recipes Tagged With: Filipino Food, Maggi, Pork Sinigang, Sinigang Recipe, Sour Tamarind Soup

  • « Go to Previous Page
  • Go to page 1
  • Go to page 2
  • Go to page 3
  • Go to page 4
  • Go to page 5
  • Go to Next Page »

Welcome to my online home

Hi, I'm MrsC, a happy wife and mom, a help-less but not helpless homemaker, who is learning to live simply in this complicated world.

Copyright © 2025 · Twenty Seven Pro on Genesis Framework · WordPress