• Skip to primary navigation
  • Skip to main content
  • Skip to primary sidebar

At Home With MrsC

Raising a family, making a home.

  • Home
  • About Me
  • Contact
  • Guest Post

Recipes

Recipe: No-Bake Graham Cracker Crust

December 8, 2012 by MrsC | Patricia Cuyugan 1 Comment

We’re having a get-together at home tomorrow, and my mom asked me to make something for dessert. We have this big container of frozen mangoes that she really wants to use already, so we decided on a mango mousse with graham cracker crust.

I’ve never made this before so I went to my favorite website, marthastewart.com to look for a recipe. I found a recipe for a frozen mango cream cake recipe with macadamia crust that looks really good. Since we already bought bags of graham crackers, I decided to use a different recipe for the crust.

I’m feeling lazy today since it’s a Saturday, so I wanted a no-bake recipe. I ended up using this one from All Recipes.

No-Bake Graham Cracker Crust

  • 1 1/2 Cups Graham Cracker Crumbs
  • 6 Tbsp Butter, Softened
  • 1/3 Cup Granulated Sugar
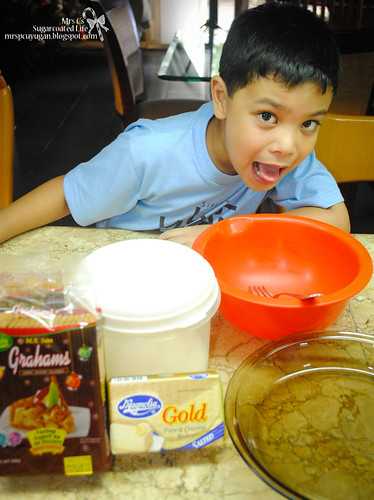
You’ll also need a 9″ Pie Plate, a Mixing Bowl, a Fork/Spoon and Measuring Cups


NOTE: Don’t forget to crush the graham crackers if you didn’t buy them already crushed, and soften the butter beforehand. It helps to cube the bar of butter so it softens quickly, although to tell you the truth, getting butter all soft and gooey has never been a problem in this hot country.
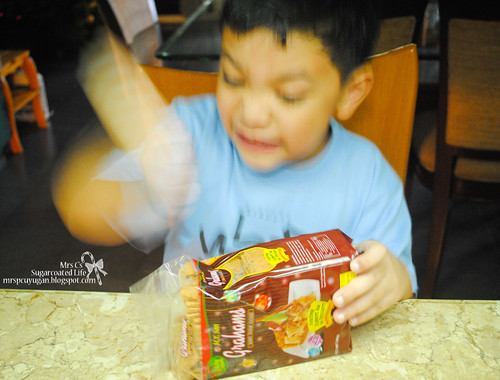
Here’s my assistant crushing the graham crackers


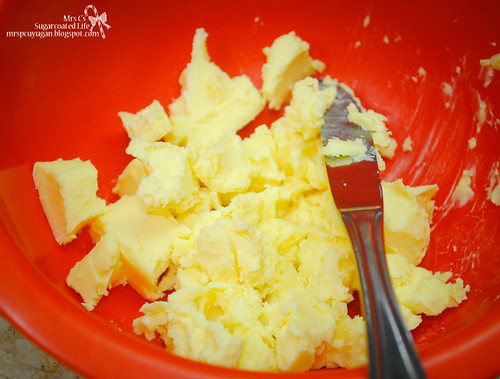
Getting the butter nice and soft


Combine all the ingredients in a bowl. Or, if you are lazy like me, bring out your handy dandy food processor and pulse away!
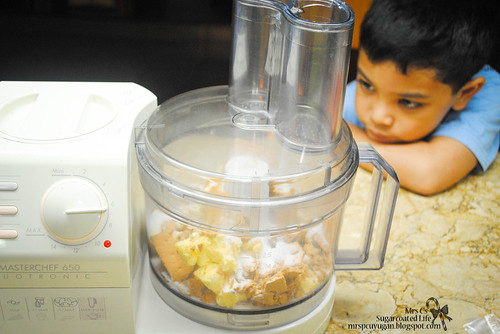
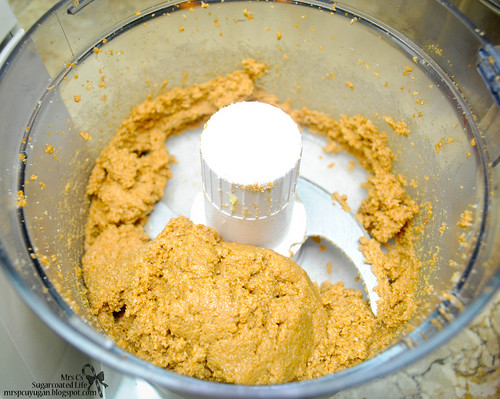
The easy way!


You’ll know it’s ready when it looks like this. Can you guess what Tristan said it looks like? Haha!


Press the crust firmly into the bottom and sides of a 9″ pie plate. You can use a spoon, a fork or your hands. I use a fork and spoon combo – the fork to distribute everything evenly, and the spoon to smooth out the surface. I don’t really like to get my hands dirty, and I find it’s more hygienic. Yes, there’s a little bit of OC in me.
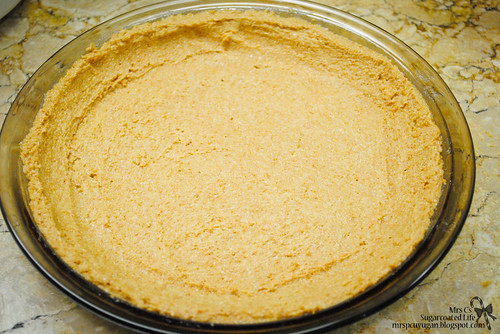
Finished crust, ready for the fridge


Once it’s all nice and pretty, cover with plastic wrap and refrigerate for an hour or until set. Make sure the plastic wrap doesn’t touch the crust ok? Otherwise parts of it may stick to the plastic once you remove it.

And that’s it, nice and easy! You can fill this baby up with a whole lot of different things. My favorite is still Blueberry Cheesecake, but I really hope this Mango Mousse will come in a close second. Keeping my fingers crossed!


What other fillings would you recommend?

Filed Under: Recipes Tagged With: Dessert, Recipe

Recipe: Cheesy and Milky French Toast

July 18, 2012 by MrsC | Patricia Cuyugan 4 Comments

Good morning!

One of the great things that’s come out of my leaving the workforce to focus more on being a mom is my learning to become a morning person. Waking up before 8AM has always been a challenge for me.

You would think that I’d be up and about by 7AM at the latest considering my 9AM clock in time at the office. But in truth, I’d be lucky to be out of bed and functional before 8:30. That explains why I was always late for work.

It wasn’t as bad when I started working close to home as it was when I would report to a Makati office. But anyway, enough about my delinquent past, after all I think I’ve been making up for it in recent weeks.

I now typically get up – as in functioning and moving about, not just awake – between 5:30 and 6AM! Can you imagine that? Yeah, never thought I’d be able to do that either. But my weekdays have been starting out that early for the last two months, with, of course, the occasional lazy morning exception.

Since I’ve been up so early, I’ve actually learned to start my day by eating breakfast. Yay! I think this is a tremendous breakthrough from having started my mornings with a hurried cup of coffee for the last five or so years. I’ve never been a morning person, so this is a definite first for me.

The only downside is I find myself tired and sleepy by 6PM, but amazingly I manage to pull through until after the little guy is fast asleep. Next up on my agenda is finding out how to have more energy throughout the day, and I already know that the answer is exercise. Lol.

So anyway, the point of this post is that I prepared a really great breakfast for my kiddo today. We both love French Toast, and I thought I’d make ours a little more exciting in the form of (his) Cheesy and (my) Milky French Toasts.

Of course, this is nothing more than cheese spread or condensed milk sandwiched in between two slices of bread, dipped in egg and milk and cooked with a little margarine (I use margarine because I don’t like the taste of butter *gasp!*).

I tried the cheesy version once with sliced cheese and found that it was tough keeping the bread slices together when dipping and flipping, so I shifted to cheese spread. The milky version is inspired by my oh so favorite Milk Toast from Kopi Roti but with the condensed milk sandwiched instead of on top of the bread. I love condensed milk. Uh-huh, this is why I’m fat.

I also prefer to use frozen old bread for French Toast, since it doesn’t go all soggy on me. I usually place old bread in the freezer straight away for mornings like this one. 

Cheesy and Milky French Toast

You will need:

  • Frozen Sliced Bread – I used both wheat and white bread, mostly ends!
  • Cheese Spread – I used Cheez Whiz
  • Condensed Milk – I used Carnation Condensada

  • Two Eggs
  • About 1/3 Cup of Milk – I used Magnolia low fat milk
  • Plus: Margarine and Pancake Syrup!

Step-By-Step:

  1. Whisk the milk and eggs together in a bowl until it becomes pale yellow and frothy.
  2. Spread condensed milk or cheese spread between two slices of bread. Don’t put too much or it will run over the sides of the bread and make a mess in your pan.
  3. Dunk the sandwiches into the egg and milk mixture. You will need to soak these a little longer than usual because there are two slices of bread that you need to moisten, plus the bread slices are frozen.
  4. Heat a frying pan, spread some margarine (or butter, if that’s what you prefer), wait for it to sizzle then place the bread on top. I like to put a little bit more margarine on the slice that’s facing up so that it browns nicely when I flip it.
  5. Brown to your liking, and you’re done!
Ready to flip!

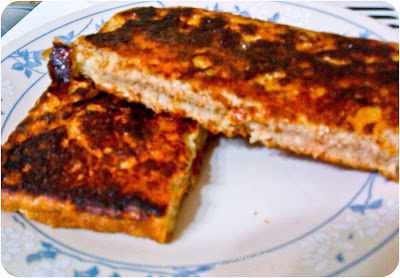
I like my French Toast extra toasted, so it may look overdone to you, but it’s just right for me. So sorry for the out-of-focus photos. The Blackberry camera sucks bigtime.

Milky French Toast made with whole wheat bread
Cheesy french toast made with white bread

Serve hot with more butter or margarine (if you wish, but I don’t add any more) and topped with pancake syrup!

Enjoy!

Filed Under: Recipes Tagged With: Breakfast, French Toast, Recipe

Recipe: Pinoy Spaghetti

October 21, 2011 by MrsC | Patricia Cuyugan 2 Comments

I took a leave from work today because of a Royal Rumble in my stomach (which is added motivation for me to stick to my diet, but I’ll save the diet musings for another post). My little guy was home today as well because of an activity in DLSZ, so I was really looking forward to having some precious mother-son bonding time. We spent the morning being lazy, which is always fun.

I wanted to prepare a nice lunch for the kiddo since it would be just the two of us sharing a meal. I asked him what he wanted to have and he cheerfully replied, “Pancit”. Unfortunately we didn’t have any ingredients for pancit, and I actually don’t know how to cook the stuff. Since I’d been craving for Pinoy style spaghetti for a few days now, I decided to make that instead. It was actually my first ever attempt to make pasta sauce from scratch. After some research online and a few tips from my cousin Zita, I bring you my version of Pinoy Spaghetti. It still needs some adjustments and tweaking, but for a first timer, I didn’t do so bad if I do say so myself. At least Tristan thinks it’s the best spaghetti ever.

PINOY STYLE SPAGHETTI
400g Spaghetti Noodles (I used Fiesta)
1/2 Tbsp Cooking Oil
1/2 Small Onion
4 Cloves Garlic
1/2 Small Carrot (optional)
1/4kg Ground Beef
1 Small Can Libby’s Vienna Sausage
1 Cube Knorr Beef Bouillon
500g Sweet Style Spaghetti Sauce (I used Clara Ole)
550g Banana Ketchup (I used UFC)
1/2 Cup Granulated Sugar
1/4 Cup Sweetened Condensed Milk (I used Alaska)
Pepper, Fish Sauce and Soy Sauce To Taste
Grated Cheese (I used Magnolia Quickmelt)

1. Cook spaghetti noodles according to package instructions.  Once cooked, remove noodles from the pot and set aside.

2. In a medium sized saucepan, heat oil and saute garlic and onions. Add ground beef and cook until light brown. Throw in carrots, Vienna Sausage and beef cube. Simmer over medium heat until bouillon is melted. Season with pepper and fish sauce. Pour in enough soy sauce to add color to the meat.

3. Pour spaghetti sauce and banana ketchup over the meat mixture. Mix well and bring to a boil, stirring constantly. Once the sauce is boiling, lower the heat then add the granulated sugar and condensed milk. Mix well until the sugar is completely dissolved. Continue to simmer until the sauce is as thick as you want it to be.

4. Remove sauce from heat, pour over cooked noodles, put cheese on top. Serve and enjoy!

Yummy yummy Pinoy Style Spaghetti!

Since Tristan had so much fun helping me prepare lunch, we decided to make another batch of banana bread for our afternoon snack. I have a whole lot of bananas in the freezer leftover from my Herbalife Shake days. My mom can’t wait to get rid of all of them and reclaim her freezer space, so a new batch of banana bread is always welcome in our house.

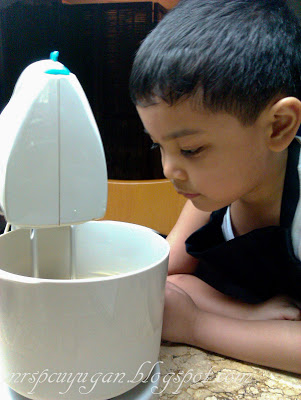
The kiddo had so much fun mashing the bananas, mixing the dry ingredients with a whisk, and watching everything swirl around in the electric mixer!

Mixing the dry ingredients
I hope someday we get to prepare our batter in a baby pink Kitchenaide mixer *ahem-ahem*

Of course, the little guy insisted on wearing an apron, so I let him borrow the one from Tupperware that I got from my CCA Kitchen Discovery Course day at Oceana.

Mommy’s little kitchen helper anxiously waiting for the banana bread to come out of the oven
The finished product. Yummy as always!

I really enjoyed my day at home with Tristan despite the discomfort of the rumbly in my tumbly. After an afternoon spent in a hot kitchen, we decided it was time to clean up and cool of in our nice air-conditioned room with The Many Adventures of Winnie The Pooh.

Watching Pooh Bear as The Little Black Raincloud

SignatureNew

Filed Under: Food & Recipes, Recipes Tagged With: cooking, Pinoy Spaghetti, Recipe

Recipe: Openface Tuna Melt Sandwich

October 13, 2011 by MrsC | Patricia Cuyugan Leave a Comment

It’s been a gloomy, rainy day, and I’m feeling under the weather.  I decided to stay home today to get some rest, and what perfect timing since classes are suspended and the kiddo stayed in too. Days like today, most people look for a hot bowl of soup, arroz caldo or champorado.  I, on the other hand, not being much of a soup lover myself, turned to my ever so reliable childhood comfort food to fill my belly on this chilly afternoon – an openface tuna melt sandwich.  This has been my go-to quick snack fix ever since my mom introduced it to me when I was maybe 8 or 9 years old.  It’s really quick and easy to make, especially in households like ours where homemade tuna spread is always available on hand in the refrigerator.

TUNA SPREAD
1 can tuna flakes in water
1/4 cup mayonnaise (you may adjust depending on how wet or dry you want your spread to be)
1 tbsp sweet pickle relish
salt and pepper to taste
chili flakes or hot sauce (optional)
TUNA MELT SANDWICH
1 slice bread
1 slice cheese
2 tbsp homemade tuna spread
1. Make the tuna spread.  Drain all the water from the tuna, dump it in a bowl together with the rest of the ingredients and mix until everything is smooth and spreadable.
2. Spread some tuna onto the bread and layer cheese on top.  Place in an oven toaster until the cheese is melted.
3. Enjoy!
I prefer to use Gardenia bread for this since the slices are large and thick. I also like to use white bread which may not be the most healthy option, but tastes best when toasted, in my opinion. You can use whatever cheese you’ve got in your fridge. Most of the time I just use quick melt, but today I found a nice slice of Dutch Edam left over from my trip to Santi’s last weekend, and that gave my snack the extra umph I needed today.  
Simple joys.  Happy tummy. 

Filed Under: Food & Recipes, Recipes Tagged With: Homemade, Recipe, Tuna Melt Sandwich

Recipe: Best Banana Bread

September 15, 2011 by MrsC | Patricia Cuyugan 2 Comments

I discovered this banana bread recipe in a library book a few years ago, and I liked it so much that I even made a few loaves and gave them as presents one Christmas.  I make mine without the walnuts coz my brother doesn’t like them.  I made a batch again today after over a year of not baking, and I’m glad that they turned out just as good as they did before.

Thought I’d share the recipe with everyone, and digitally archive it as well in case I lose my precious recipe notebook.  Do let me know how it turns out in case any of you try to make this yourselves.

 
BEST BANANA BREAD
2 1/2 cups all purpose flour
1 1/2 teaspoons baking soda
1/2 teaspoon salt
3/4 cup salted butter, softened
1 1/2 cups light brown sugar, packed
2 large eggs
3 cups ripe bananas (about 7 medium), mashed
1 teaspoon pure vanilla extract
1 cup (4 ounces) chopped walnuts (optional) 
 
  1. Preheat oven to 325°F.  Grease two 9×5″ loaf pans.
  2. In a medium bowl, combine flour, soda and salt with a wire whisk; set aside.
  3. In a large bowl, cream butter and sugar with an electric mixer.  Add eggs, bananas and vanilla, and beat at medium speed until thick.  Scrape down sides of bowl.
  4. Add the flour mixture & walnuts, then blend at low speed until just combined.  Do not overmix.
  5. Pour batter into prepared pans.  Bake on center rack of oven for 60-70 minutes.  A toothpick inserted in center should come out clean, and the bread should pull away from the sides.
  6. Cool in pan for 10 minutes.  Turn pans on sides; cool to room temperature before removing and slicing.
Enjoy!  Our household certainly did.

Filed Under: Food & Recipes, Recipes Tagged With: Baking, Banana Bread

  • « Go to Previous Page
  • Go to page 1
  • Interim pages omitted …
  • Go to page 3
  • Go to page 4
  • Go to page 5

Welcome to my online home

Hi, I'm MrsC, a happy wife and mom, a help-less but not helpless homemaker, who is learning to live simply in this complicated world.

Copyright © 2025 · Twenty Seven Pro on Genesis Framework · WordPress